So, I have had these pictures taken for WEEKS! And now it is after midnight in my hotel
room at Sewing Summit, but it is quiet so I am stealing this minute to write these
down. Maybe you’ll get a chance to sew them together this weekend 🙂 Let’s start by
laying out our rows on a flat surface. 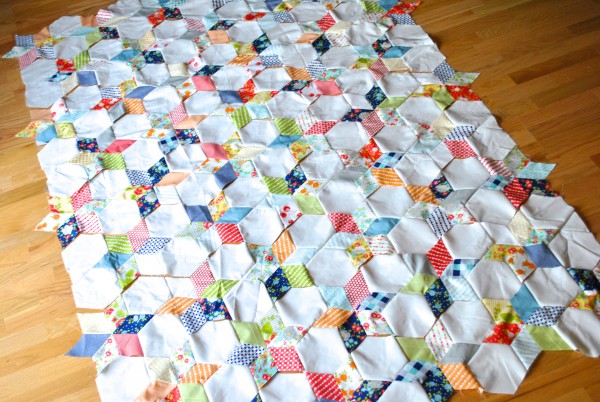 Split your rows into pairs, you will be sewing together
seams that look like this: 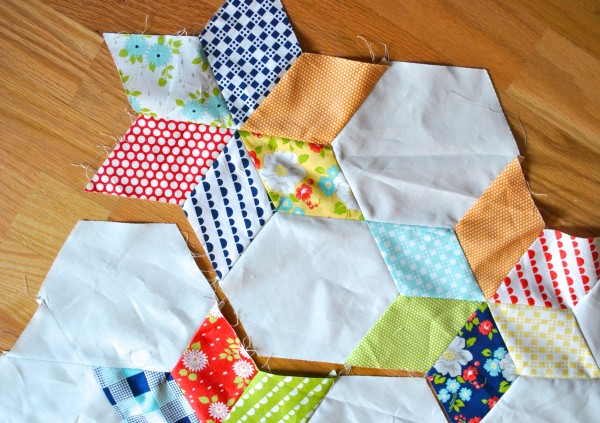 Flip the top (the one with the star flower on the edge)
over and pin the correct edges together. 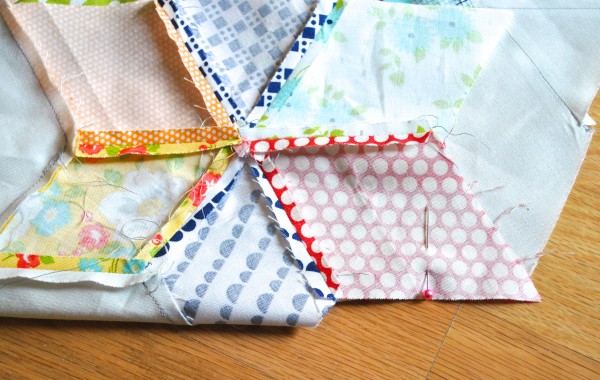 Now, head over to your sewing machine, and sew that
edge together, stopping 1/4″ from the corner/edge of fabric: 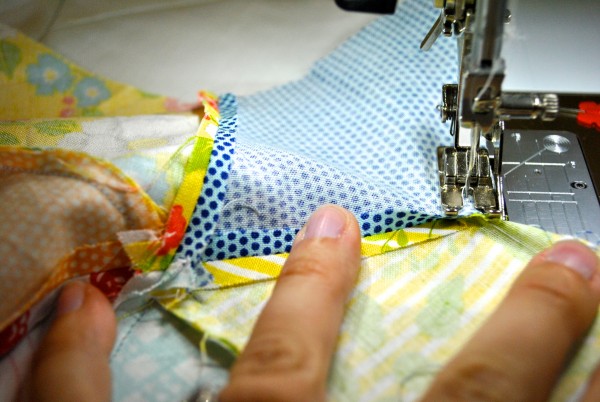 Here is the part where you have to remember that your
fabric is not fragile. You will need to line up the next seam so that diamonds touch
hexagons. This will require a bit of twisting the first seam out of the way. Just make
sure not to catch it underneath when sewing the next seam (Ask me how I know that can
happen…) Once you have the edges lined up, pin the little tabs that stick out just
like you did in the last step to allow perfect points. 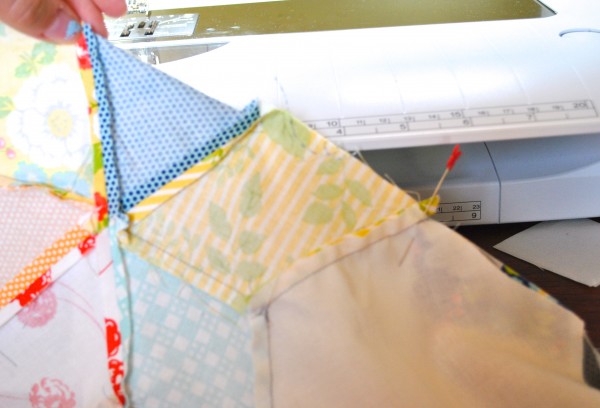 Start stitching where your previous seams ended (1/4″
away from the edge) and stop sewing 1/4″ before you get to the next edge Keep on
twisting the fabric so that you can line up the next seam, pin and sew. Repeat these
steps until you have all of your rows sewn into pairs (except that lonely bottom 9th
row.)  Now, just repeat these steps sewing together the top two pairs of
rows, then sewing together the bottom five rows.Last, sew the two halves of the quilt
top together. It is a bit of starting and stopping and a good ebook (or a lovely
chatting companion) would be a great way to pass the time. All right, that wasn’t so
hard, was it?! I can’t believe it took me so long to write it all down. But, I did.
Now, we just need borders and you will be all DONE! Yay!!!! Now that sewing
summit/family trips/massive fabric deliveries/every family birthday.anniversary.special
occasion are over for a bit, hopefully it won’t take me so long to get the last step
posted. Thank you so much for following along!

Looking good! Hope you are having a great time!
Absolutely beautiful.Hope you are having fun day!1
Trying to locate your email to see if you would be interested in working with Skip to my Lou on an upcoming series. Can you respond with it? Thank you!