So, you may (or may not! I certainly forgot!) remember last summer I promised a tutorial for my ‘Web of Ties’ block. You can see my original post and photo here:

Well, it has been the better part of a year and I finally got down to finishing up the quilt top. Hopefully by tomorrow night, I will have a new quilt! My quilt is only made up of nine of these blocks and it is a great way to use up skinny little scraps. I even sewed some REALLY skinny strips together to make some of the strips. I used Summersault by Erin McMorris, but I think this would look awesome with a scrappier theme! I took a few pictures and wrote down how I did it, so if you are interested, here is the basic block tutorial. Each block finishes around 11″, but it will really depend on your seam allowances and how you square up the block.
You are going to need:
1 ish yard of solid fabric (I used Kona White)
Lots of little skinny scraps .75″ or wider x 5″. I probably had about 1/2 yard by weight. These should be sorted by color 🙂
some chubby little scraps ~2.5″x2.5″
Amanda’s Sewing Template (this should take up the entire 8.5″x11″ paper)
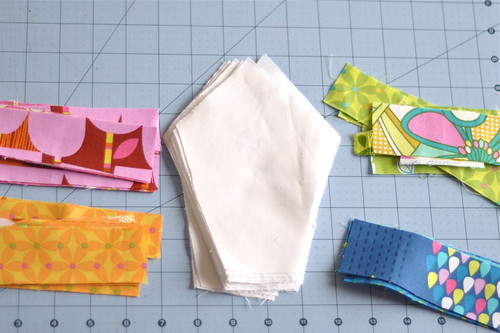
Start by cutting out your templates. I used freezer paper for the templates, but use whatever you have laying around. Then, I am sure that the shape has a name, but use the diamond looking template to cut your block centers from your solid fabric. You will need four of the diamonds for each block. My quilt had 9 blocks so 9×4=36 white solid pieces.

I did each block individually. It helped me keep the colors organized. If you were doing a scrappier version, feel free to skip ahead. Start by laying out the diamonds like so.
Then, choose your colors and lay out your scrappy strips.
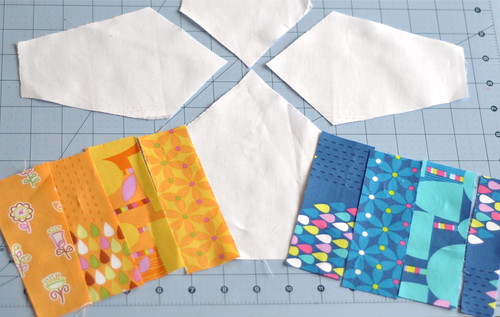
Do this with each of your diamond pieces, making sure your colors are lined up.
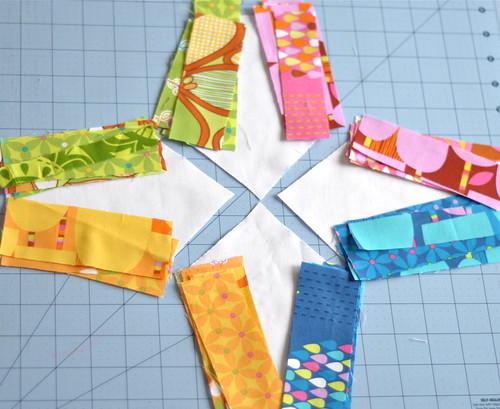
Then, I stacked them carefully and sewed them together like this

Once they are sewn together, press the seams away from the solid. Or press them open, if you are the patient type (which I am not, yet…). I used quite a lot of starch when pressing these and found it helped a bunch later. You are going to be dealing with some bias cuts and the starch made it a bit less stretchy. I will write an ode to my best press later… here are my seams:
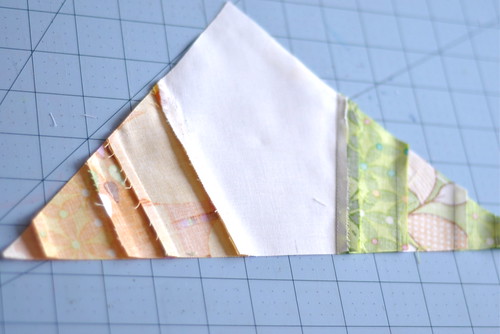
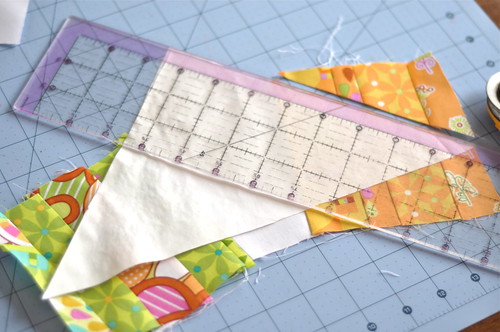
Using the triangle template, which should measure 8.75″ on each short side (don’t worry about the tippy tip of the triangle not being there on one side, they all get trimmed off anyway!), trim each sewn piece into the shape of the triangle.
Now, choose the colors for the ‘butterflies’ or ‘ties’ or what you want to call them from your small chubby scraps. Again, these can be scrappy or color coordinated.

Place the chubby scrap right sides together with the triangle top, making sure that once you factor in the 1/4″ seam allowance, the scrap piece will cover the top of the triangle. It sounds confusing, so follow the pictures, not my words…


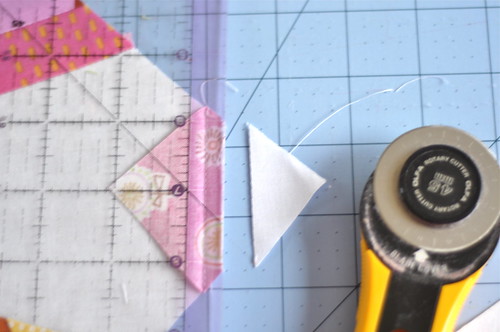
Then, just assemble the block and start the next one, making sure that your colors all line up. I found I could get a block done in about 10 minutes once all the pieces were cut.

Ta Da!

Since I don’t love square quilts and mine finished as a square, I used one of my favorite prints from the line and added a 5″ (4.5″ after sewing) strip to the top and bottom and a 2.5″ strip to each of the sides. Then using white, I added another border of 6.5″ (6″ finished) to the top and bottom and 3.5″ (3″ finished) to each side. It is currently on my machine and I can’t wait to show it to you, finished and ready to find its new home!

If you have any questions, feel free to email me! I am suffering major two-weeks-till-D-Day brain failure and could easily have forgotten something!
PS: I announced the winner to my FMF giveaway on facebook. We can all give a congrats to Georgia in Australia! Your bundle will be on its way in the morning!

oh my gracious! i love this!!!! pinning… please don’t sue me! 😉
Still *squealing* over here!!!
Thankyou for the utorial too – I’m adding it to my ‘evernote’ thingummy where I keep all my “one day” project ideas. 🙂
Gorgeous quilt! Hope you don’t mind if I pin it!
This is super sweet, Amanda. I will list it on the tutorial list I have on my side bar. Thanks for sharing!
Great tutorial! Love this block and I’m going to add it to my ‘I have to do this’ pile of quilts I want to make!
thanks so much for sharing!
what a fabulous tutorial and block!! I must give it a try!! 🙂
Lovely quilt. So colorful and pretty. And I’m pretty sure you made a mistake and that your mom is really the winner of the FMF bundle? No? Really? Darn. Well congrats to Georgia, and thanks for the tutorial. Truly lovely.
so so pretty!! I love this line. Reminds me that I have a stash of it somewhere… I should pull it out and whip this up!
Gorgeous! What a great idea to add the little “butterflies” in the centres of the blocks! This would make a fabulous quilt bee quilt.
love your finished quilt and thanks for the fabulous tutorial – hope you don’t mind that I pinned it !