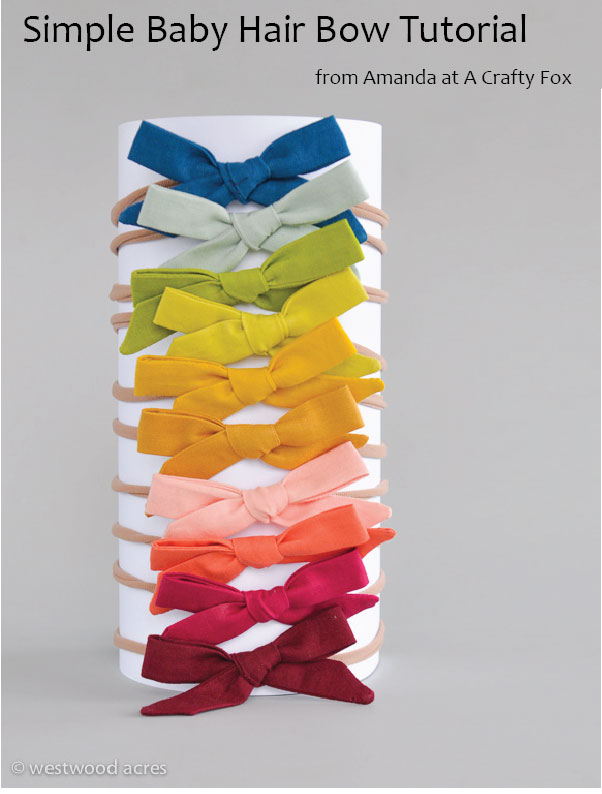
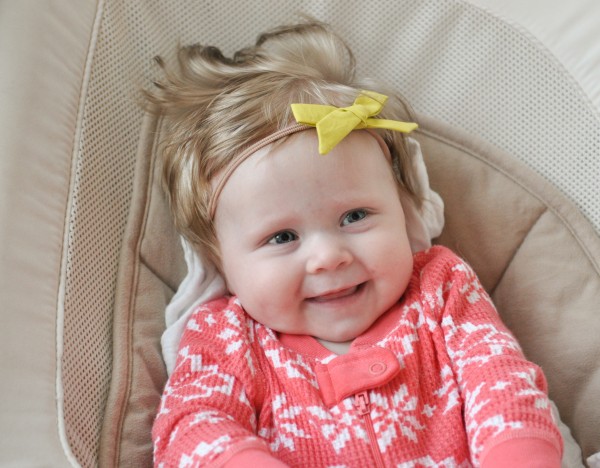
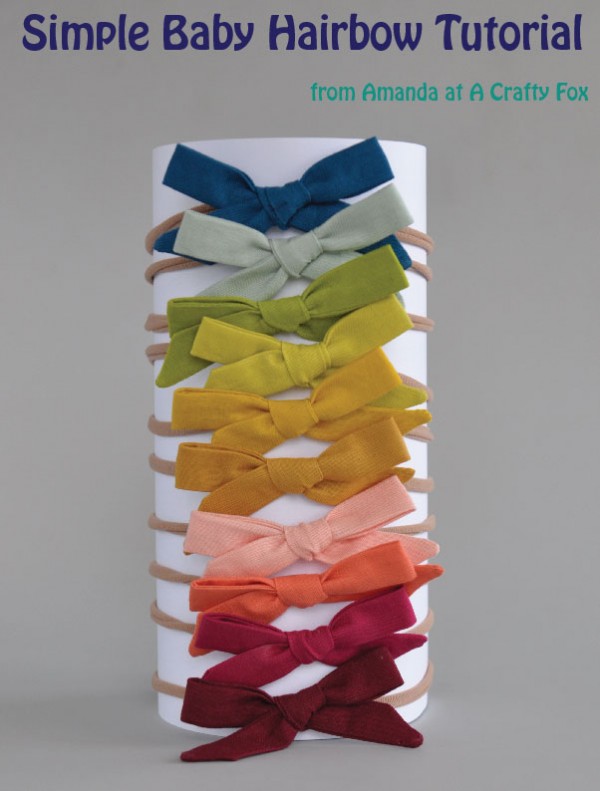
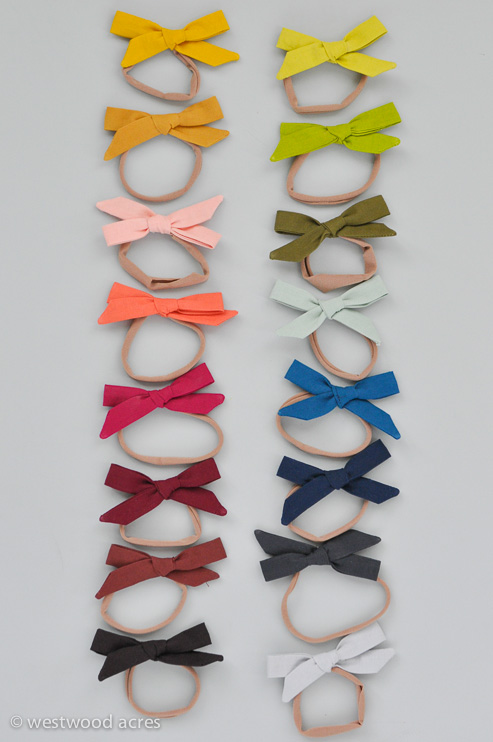
I’ve been having a BLAST with my little girl. Getting her dressed is fun, but often times I think she is more comfortable in pajamas. But I love seeing cute little bows in her hair. I’ve found a few shops that sell these, but it seems a little bit silly when I have so many fabric scraps laying around.
It’s a quick, easy project and they make great gifts! So, if you’ve been looking for a fun, quick sewing project or want a quick gift to go with your handmade double gauze swaddle blankets, here it is! (Make sure to pin this for future reference!)
To start, you’ll need to gather up your supplies:
12.5″ x 1.75″ scrap of fabric. (I made mine from the solids in our shop’s Rhoda Ruth Solids Bundle)
Matching thread (it will show!)
Turning tool (I recommend using a large head metal crochet hook. i broke 2 plastic turning tools)
Old Sewing Machine Needle
Embroidery Needle
Starch (I REALLY recommend this spray starch. It doesn’t leave a dirty grey residue)
This type of Dance Tights
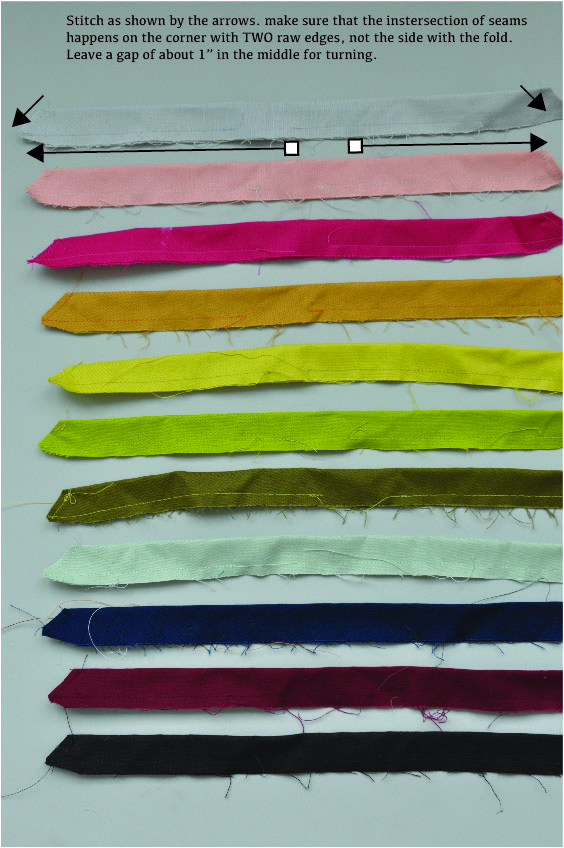
Let’s get started! Fold your fabric lengthwise right sides together and stitch 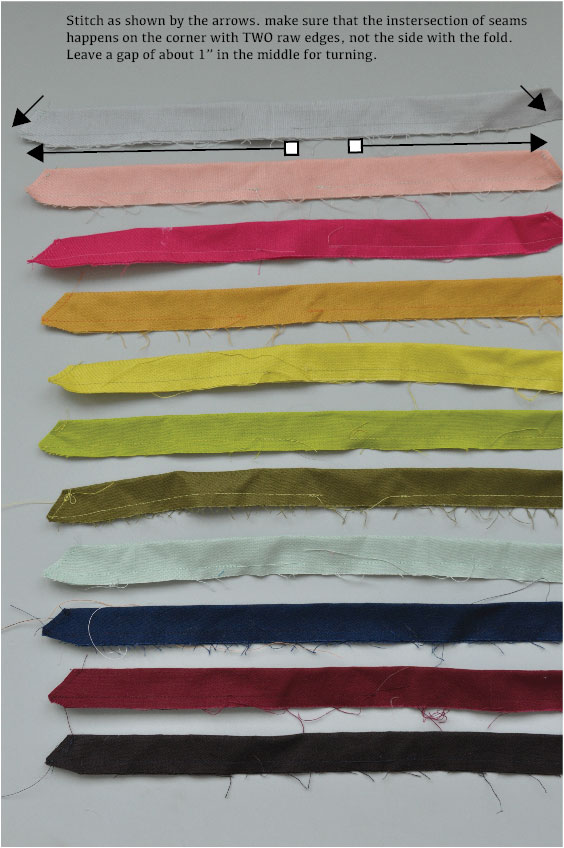
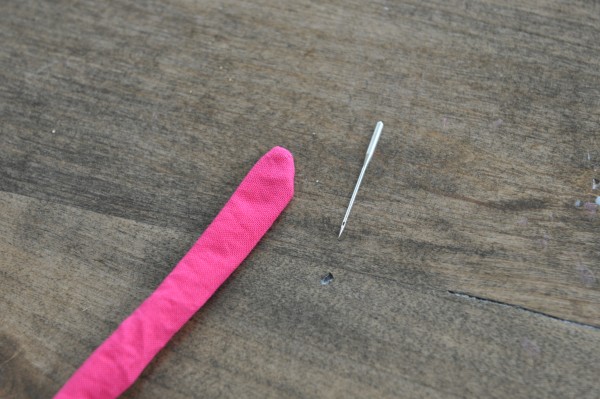
Trim the ends as shown in the picture. Using your turning tool, insert the turning end into the tube and twist, pulling the ends out. You won’t be able to get a good point yet. Go ahead and grab your dull sewing machine needle. Veeerrrrry carefully, pull the point out.
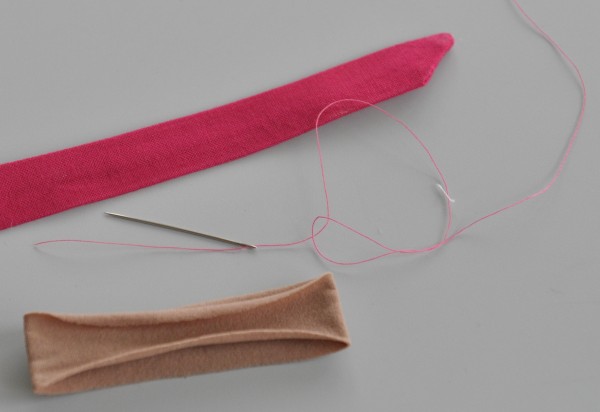
Once you’ve pulled out the point, finger press (or iron) the seam allowance of the opening under and stitch it closed with a ladder or slip stitch.

Using starch, press the bow flat flat flat. Use lots of starch. Let it cool under a heavy book.

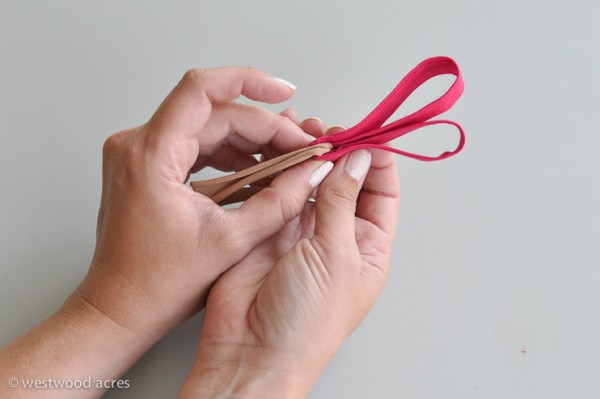
Ok, so now it is time to tie these to your head bands (you could also tie these around a toothpick and then insert a clip instead). Slice a 3/4″ piece of width of the tight’s leg. Fold the hair bow fabric 1″ from the center. I’m right handed, so I had the longer side on the left.

Fold the tips down to form two loops.
Cross the LONGER side over the shorter side.
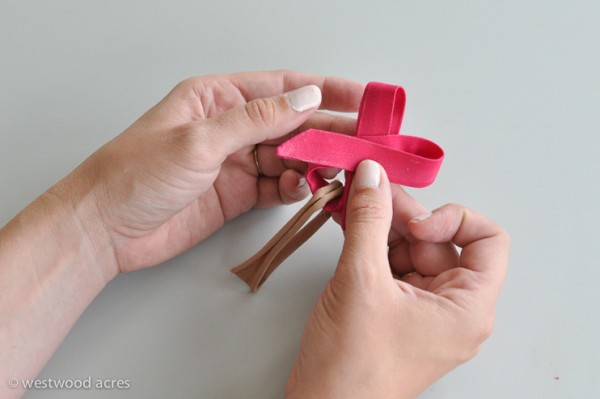
Tuck the FOLD of the longer side behind and through the opening (like tying shoelaces :)) Make sure you are keeping the fabric flat and straight. Avoid twisting it. (also, you can see I didn’t use the starch I recommended – don’t use Faultless!)
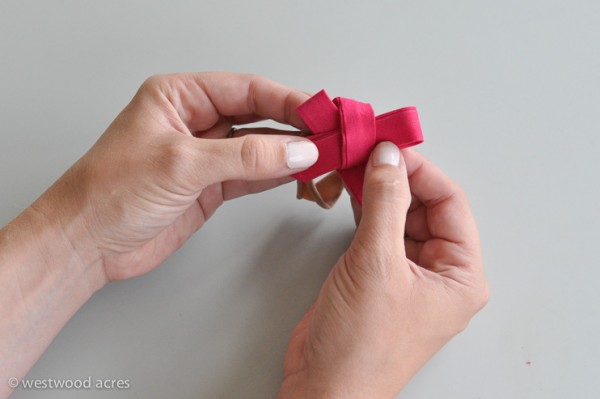
Pull the bows tight by pulling the loops away from each other. Even things out if necessary by loosening the bows by tugging at the bottom ties.
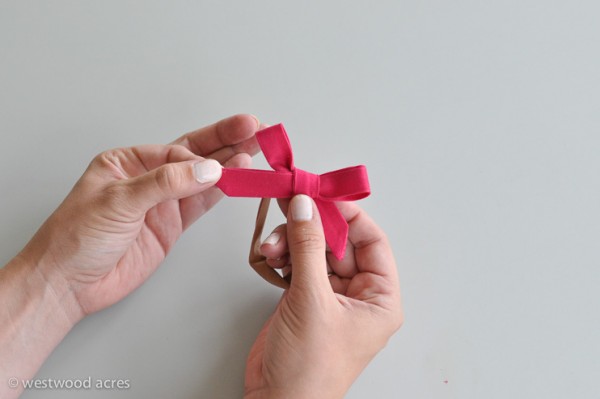
Lastly, insert a stitch or two on the backside of the bow, permanently securing the bows shape. Otherwise, when your three year old finds them, you will have to press & retie all of them (Ask me how I know)
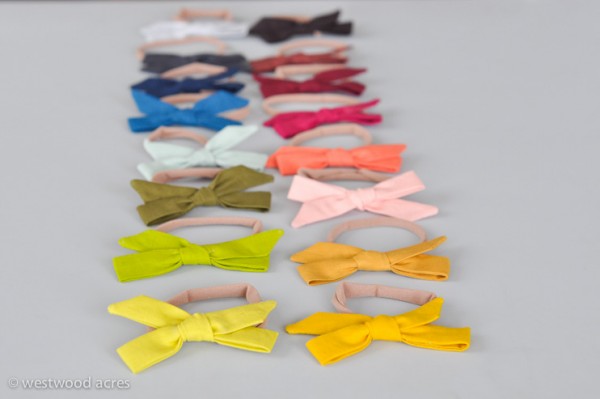
Now you can make your baby a whole rainbow of pretty bows. And they would be stunning out of Liberty fabrics!
I really appreciate you reading along with me. I’ve decided that I really miss actually blogging, writing tutorials and taking pictures with my real camera. I’m hope to put more time and effort into it in the future. If this is the type of content you would like to see more of (or if you have questions, thoughts, etc) I’d love to hear from you in the comments section! And if you like the tutorial, I would be incredibly grateful if you’d share it on pinterest! Thank you again!
xo
![]()

I’m in love with these sweet headbands! I just found out I’m having another girl and was hoping to create some new headbands—these are darling! So happy I happened upon it on Instagram. And great tutorial, you made it look so easy! Can’t wait to get started. Thanks for the post!
How cute! A new granddaughter on the way so I will be making these in a few months. I love the tutorials Amanda. I just made and gifted my 4th hexie pincushion. It’s fun to make and always gets Wows!
I just want to squeeze that little girl (but not tooooo hard of course!). She looks adorable in those pretty bows. Thanks for sharing!
Thank you for the wonderful tutorial? What size/color tights did you use?
I linked to the exact pair in my post 🙂
Hi the link doesn’t seem to be working. Can you relink or tell us the name, color, size! Thank you so much!
Hii what type of fabric did you use for head bands?
Thanks for the awesome tutorial! Could you explain how to turn them right side out? My crochet hook put a hole in the fabric when I tried to turn it!
Thanks for sharing this guide, love these baby hair bows. My little princess will love them for sure
Yes would love to know where you get the headband nylon what color, thanks for this tutorial:)
Hi! I linked to the exact pair I used 🙂 They are from Zappos
Hi, did u stitch back that gap ? Or should i leave it like this?
Hi, I am a beginner! I just bought a sewing machine and I’m dying to learn how to make these bows, your tutorial makes it sound easy! I was wondering what kind of fabric did you use on these bows?
What kind of fabric did you use for these bows?
Thank you for posting this!! I’ve been wanting to make some of these since I can’t justify buying them haha 🙂
Why do you recommend the starch? And which brand did you find worked the best? Thanks!