• About
    • About Amanda
    • Resources
  • Tutorials
    • Quilt Patterns
    • Home & Decorating
    • Sewing
    • Recipes
  • Shop
  • Contact
    • Collaborate
    • Ask Amanda

A Crafty Fox

Quilting. Books. Lifestyle.

  • About
    • About Amanda
    • Resources
  • Tutorials
    • Quilt Patterns
    • Home & Decorating
    • Sewing
    • Recipes
  • Shop
  • Contact
    • Collaborate
    • Ask Amanda

Show Off: A Pillow Tutorial (part two: the one with the Y-Seams)

February 7, 2013

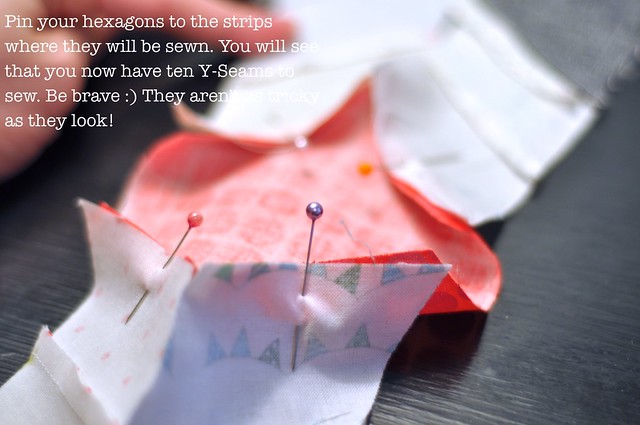
Hi, again! So we left off yesterday with the hexagons pinned to the strips and we were about to tackle the Y Seams. These seams have a bad rap. They aren’t really hard and after the first one or two, you will be a pro. Keep your seam ripper handy just in case, but the worst that can happen is you pick out a stitch or two. Deep breath, ok?

Here we are:
Tutorial pin strips to hexagons

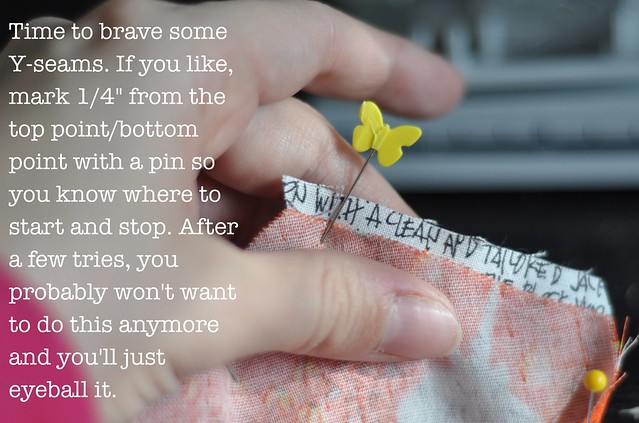
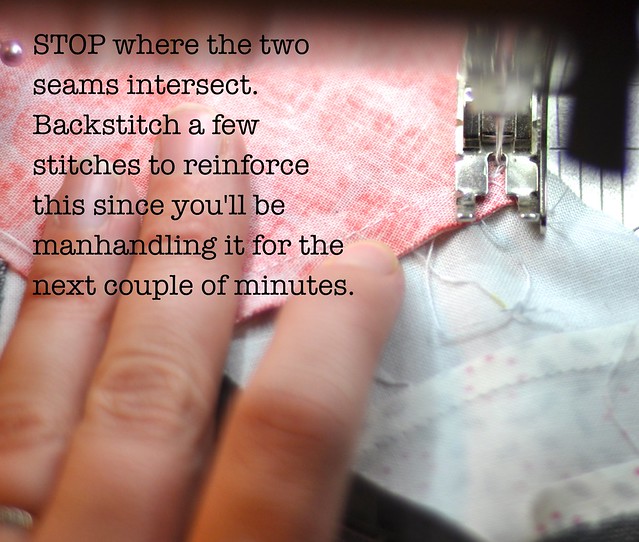
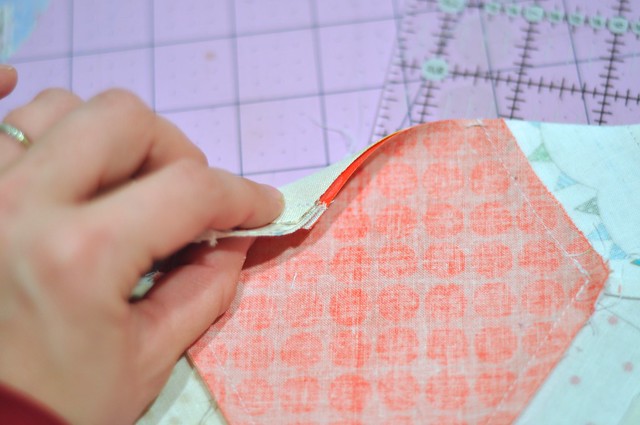
Take the top of your hexagon with the two strips attached. If you would like, mark 1/4″ from the top point with a pin.
Tutorial Y seam Pin Mark
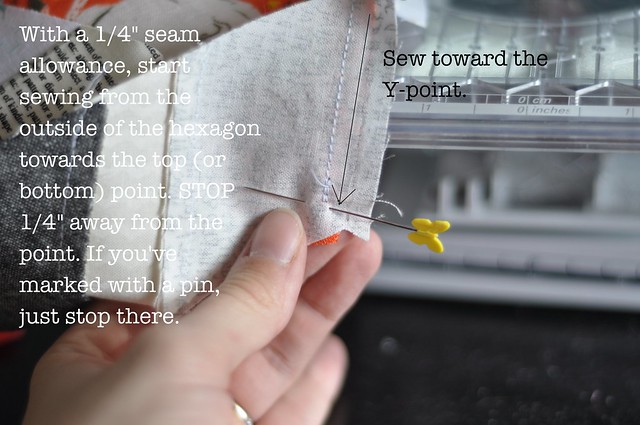
Then, sew from what will be the straight, outside edge toward the middle point
Tutorial Sew from Outside In
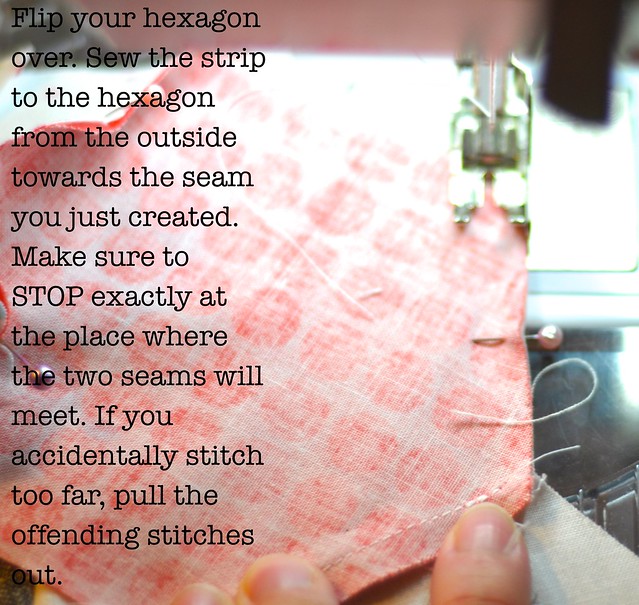
Now, flip your hexagon over and repeat from the other side
Tutorial Second Seam Toward Point
Tutorial STOP where the seams meet.
Tutorial pinch inside corners
Tutorial Pull hexagon out of the way
Tutorial Sewing the base of the Y
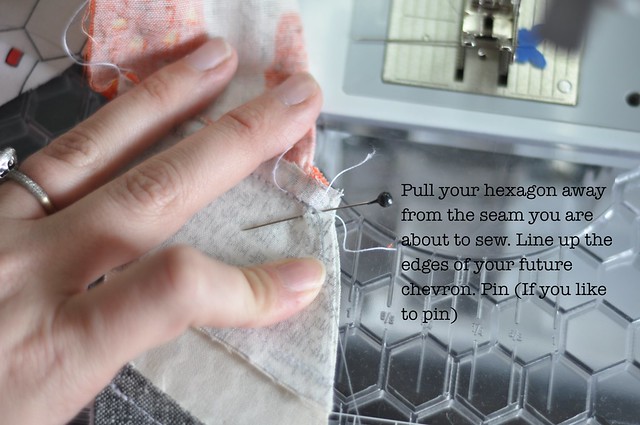
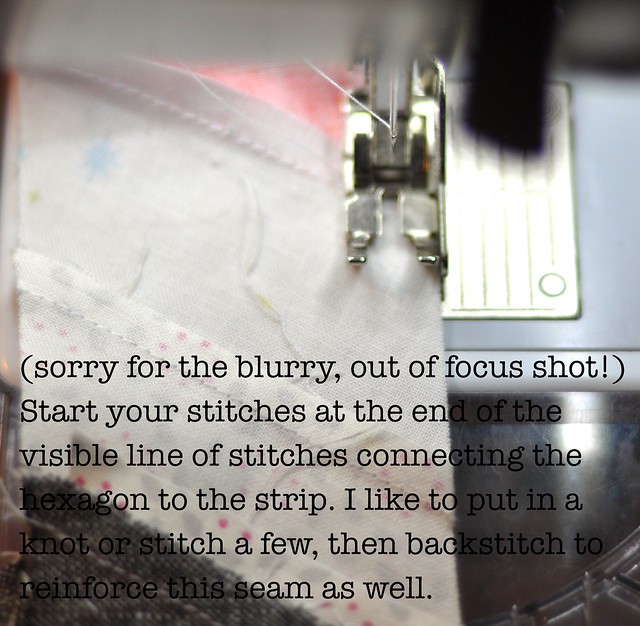
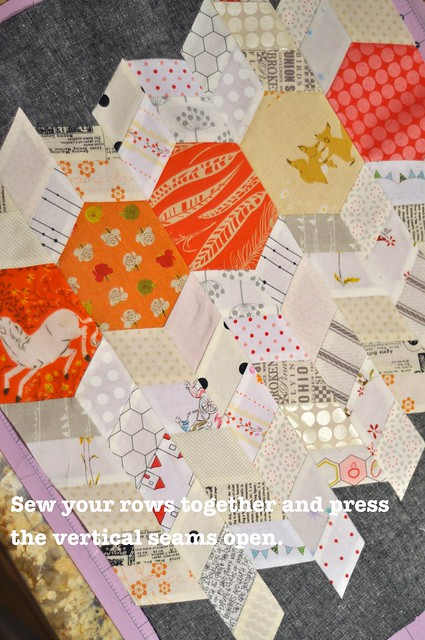
Repeat the Y Seam technique for the nine seams. Press the vertical seams OPEN. Otherwise you will have a strange, layered effect that breaks up the continuity of the chevrons. Once they are pressed, trim.
Tutorial Trim Rows
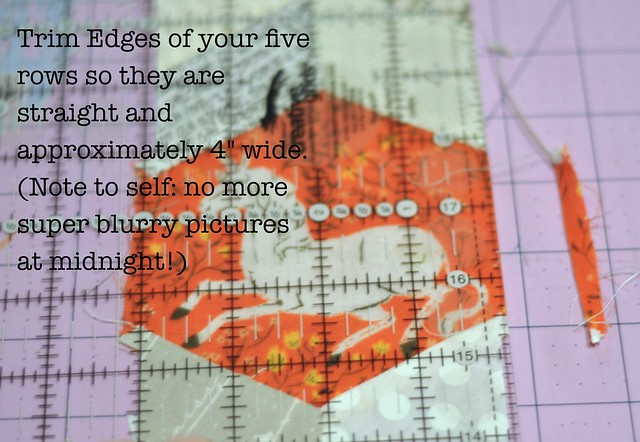
They should measure right around 4″ wide.
To assemble, line the hexagons up. I think it would look really cool with the hexagons in varied positions as well!
Tutorial Line Up Hexagons
Tutorial Sew Rows Together
Tutorial Trim Block
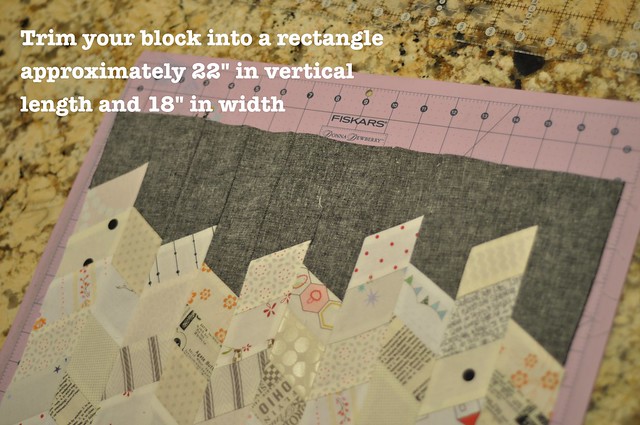
Trim your jagged edges. Mine measured about 21″ in length. Now, cut the last strip of essex linen into (2) 2.5″ x 21″ pieces and stitch to the two edges. Press those seams open and square on your cutting mat.
Voila! You have a pillow top. Now it’s time to baste and quilt as desired.

I really can’t wait to see these if anyone else makes one! I would love it if you’d post it in my little A Crafty Fox Flickr Group!!

If you have any questions, just leave them in the comments and I’ll write back.

Thank you for reading
xo
Amanda

signature

Related posts:

  1. How To Make A Mummy Pillow In Under An Hour – {Halloween Week!}
  2. Festival of Hexagons: Seaside Chevron Tutorial
  3. Show Off: A Pillow Pattern with Bonus Y-Seam Tutorial (part one)
  4. Pointed In The Right Direction Pillow (Tutorial and Giveaway!)
   

Filed In: quilt tutorial, Tutorial
Tagged: free quilt tutorial, free y seam tutorial, how to sew a y seam, quilted pillow

« Show Off: A Pillow Pattern with Bonus Y-Seam Tutorial (part one)
Pay It Forward 2013 »

Comments

  1. Mary on Lake Pulaski says

    February 7, 2013 at 11:51 am

    Great finish to the tutorial Amanda! I can’t wait to make one!

  2. Kristi @ LollyJane says

    February 7, 2013 at 2:21 pm

    Hi there! I am not a sewer (at all) but looove the fabrics you’re using for this project- sooo cute! Just wanted to say that I LOVE your header and blog design; it is simply gorg!!

    Happy Thursday! 🙂

  3. Megan says

    February 7, 2013 at 3:11 pm

    Thank you so much for the Y-seam tutorial and instructions for your seriously gorgeous pillow! I will make this! Hopefully in the next week or two. Again, thanks so much! I am so excited!!

  4. Anita says

    February 7, 2013 at 4:37 pm

    Wow, you make it looks so easy! I hate y-seams, so I’m hoping to give this a try. Will need to pick out some fabrics and hold my breath 🙂 Thanks for the tutorials!

  5. Gina says

    February 7, 2013 at 11:22 pm

    Thanks for the tute Amanda!! I love both of the pillows you made but the low volume one is my fave!!

  6. elsa says

    February 8, 2013 at 6:34 am

    I’ve never done Y-seams ~ think this may be my next challenge ~ I’ve got some pretty enchino fabrics that would be perfect for this. Thanks so much for the tutorial!

Stay Connected

Bloglovin Email Widget

Follow

Our Little Fabric Shop!

IG: @acraftyfox_amanda

This error message is only visible to WordPress admins

Error: No posts found.

Make sure this account has posts available on instagram.com.

Recent Posts

  • Living In A Fairytale
  • Denim & Lace – Week One
  • What the World Needs Now…
  • Contemporary: A New Quilt Pattern
  • How Quilters Simplify (A Giveaway)

Archives

Activate By Bloglovin

Categories

Let’s Play Nice

These ideas and images are all created by me and shared freely on this blog. If you would like to use any images or ideas on your website, please ask first. I promise I don't bite! You are always welcome to link back to or pin any post. And I always love to see what you make! Feel free to share them in the I'm A Crafty Fox Flickr Group :)
All images, text and content copyright 2011-2012 by CraftyFox Fabrics, LLC

Theme by 17th Avenue · Powered by WordPress & Genesis