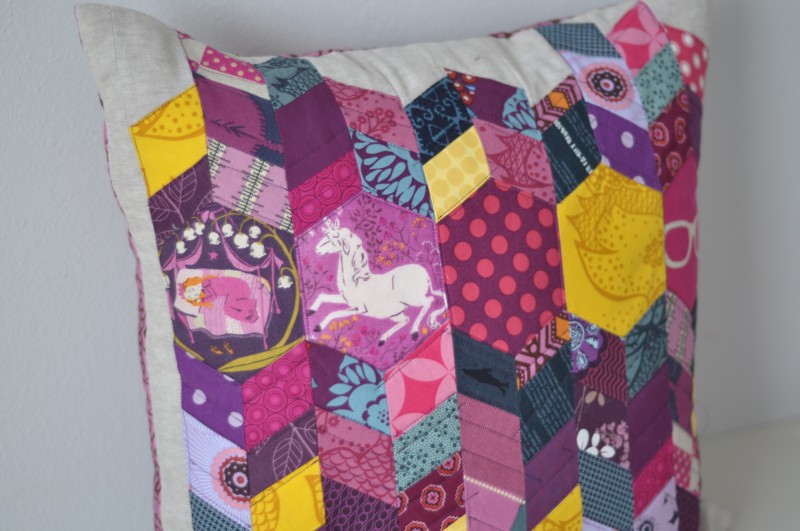
So, let me start with a HUGE thank you to everyone who left a nice comment here or anywhere about this pillow. And a giant hug to all the sweet comments on my new and cherished Swoon quilt, here and on my mom’s blog. I wish I could make each of you one of these pillows!
Since I can’t, though, I will share this pattern with you instead. I decided to hand quilt my new pillow, so all you get to see rig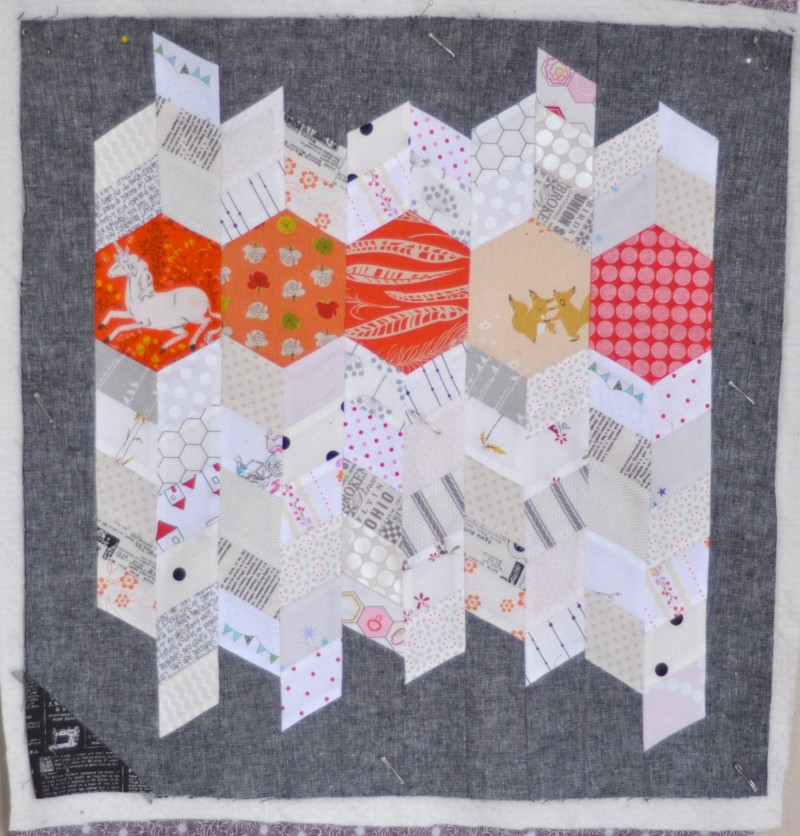 ht now is the pillow top. Tonight I plan to curl up on the couch after the kids are tucked in, watch inordinate amounts of Ryan Gosling and hand quilt this little guy. I’m calling him ‘show off’ since he shows off my favorite fabrics so well!
So, first, pull your fabrics. I used this low volume bundle that we still have in my shop (but probably not for long! It is flying off of the shelves!) I also pulled a few of the prints included in our Cookies and Cream bundle. Cut the low volume pieces into strips 1.5″ to 2.5″ wide and at least 12″ long. Then I pulled five focus fabrics. You can use scraps, but your pieces need to be at least 4.5″ x 5.5″. Last, you’ll need about a half yard of Essex Linen in black. Or, you can go with your own color scheme. My first color scheme was purple.
Start by cutting.
***Cut your focus fabrics into 2.5″ hexagons. This means each straight edge will measure 2.5″. Kati has a great tutorial on how to cut these if you don’t have a template.
***Cut your strips from your low volume fabrics or scraps
***Cut your Essex Linen into six 2.5″ strips
Familiarize yourself with the 60 degree and 30 degree lines on your cutting mat.

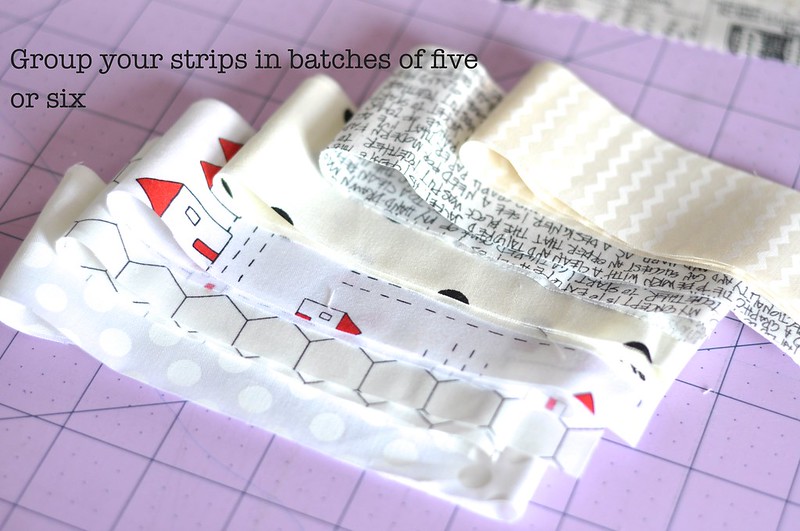
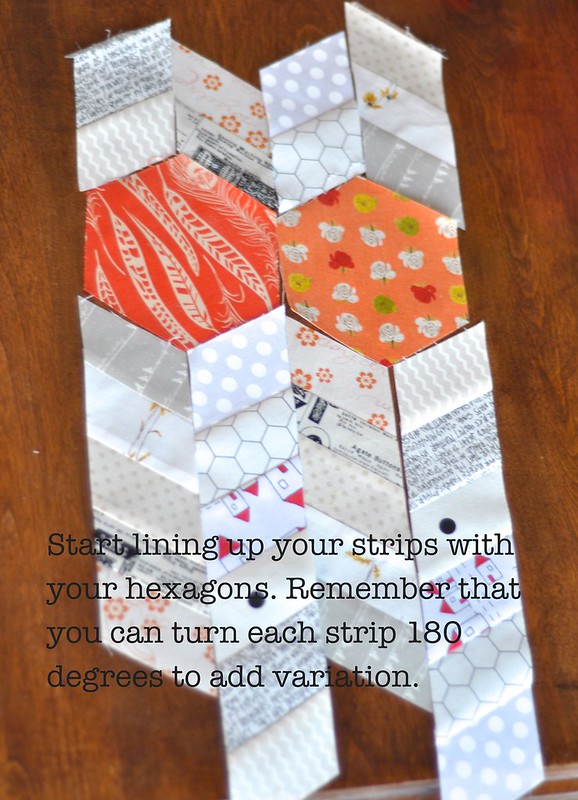
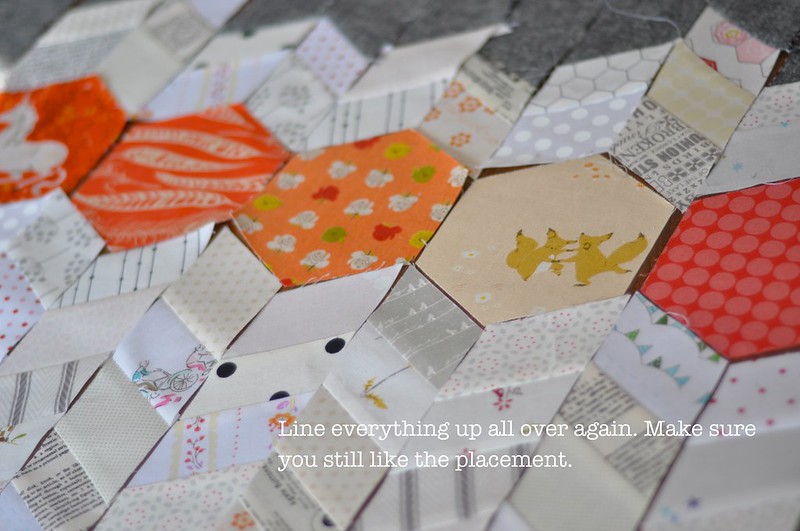
Group your strips

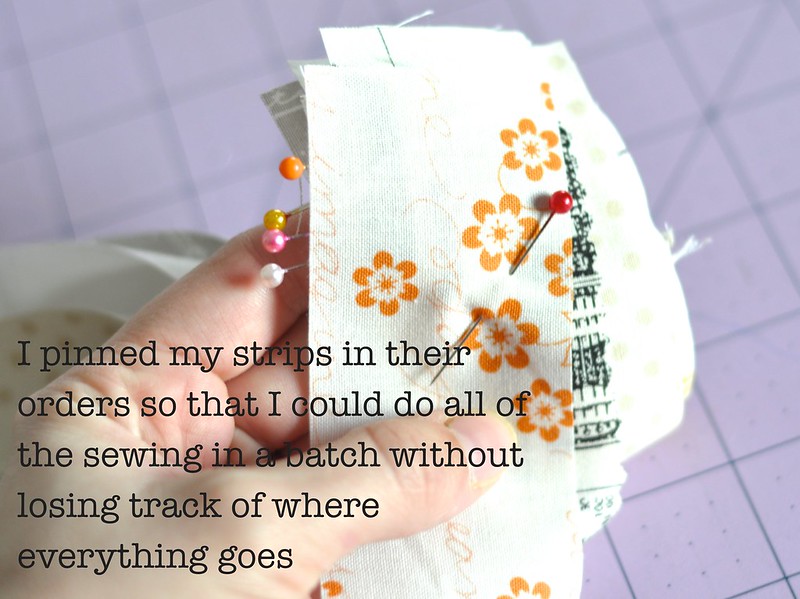
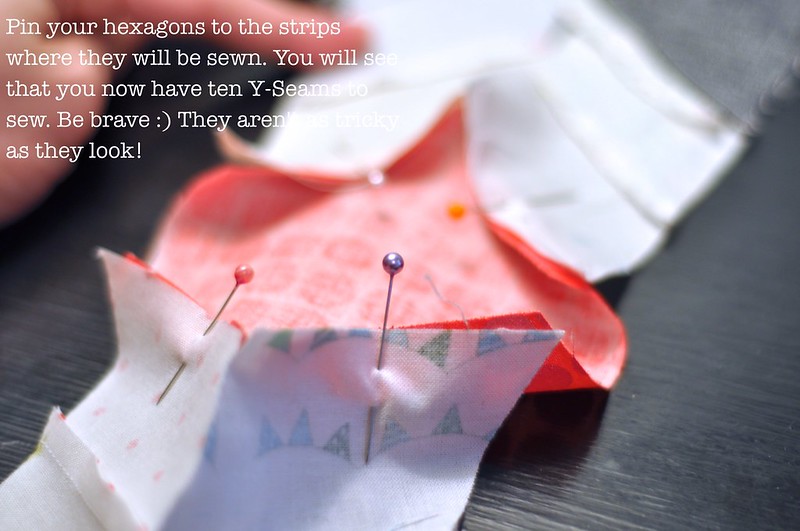
Use your pins to mark where each strip attaches to the next strip.

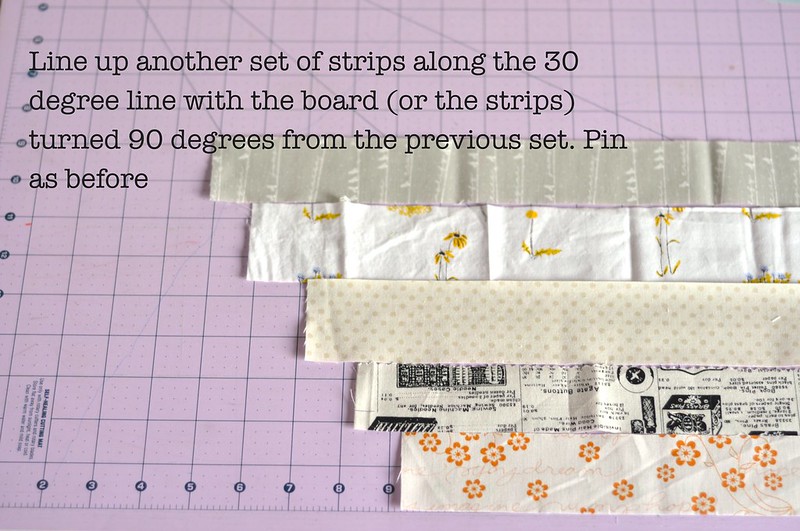


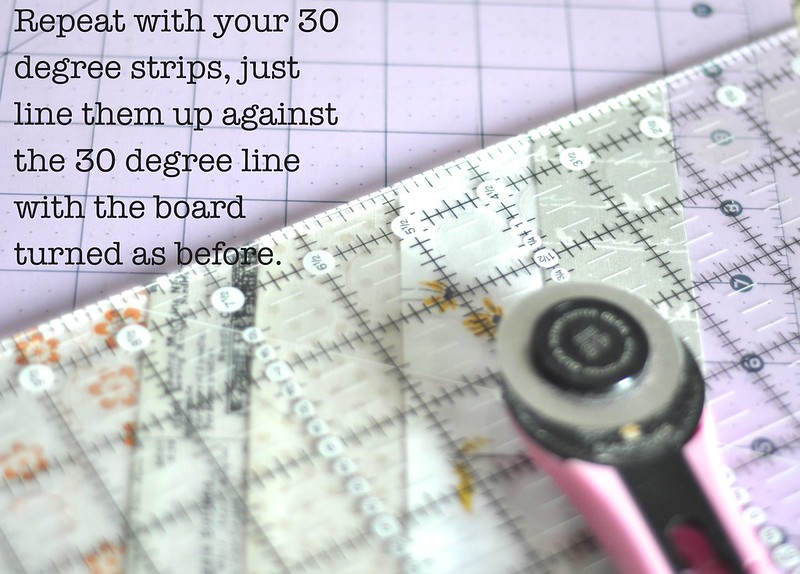
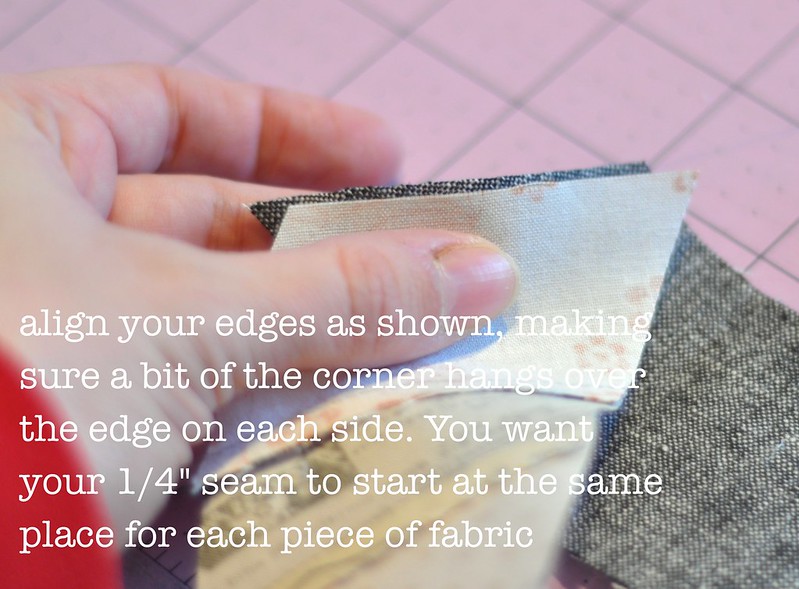
****Cut each of your rows of fabrics into 2.5″ strips. Line up the 2.5″ mark on your ruler with the new, angled edge of the fabric.

**To make the shorter strips that go above the hexagons, you will need to rip apart one of each of the strip combinations into rows of twos and and threes.

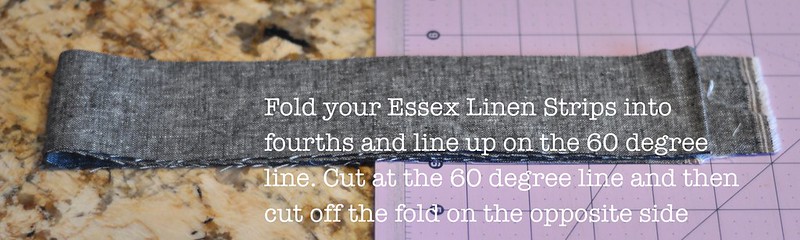
****With five of your linen strips, fold them in fourths and cut them at a 60 degree angle. Since the fabric is reversible, you don’t need to cut some at 30 and some at 60 🙂
***Sew the low volume strips to the essex linen. Press your seams however you like 🙂
Whew! That is A LOT of steps, it seems, but it will go pretty quick. I’ll post the rest tomorrow. That will keep the page from loading slower than molasses as well as give you a good stopping point. If you just can’t wait, all of the photos have already been uploaded to my flickr stream (Warning, they are in no particular order)
I’ll be back tomorrow with the rest.
And I’ll answer Bri’s super nice question of how I get my pillows perfectly square and poofy next week 🙂
More soon!
Amanda

Oh, it’s just lovely! Can’t wait to try it!
So cute, thanks for sharing the tutorial! When I first saw this I was trying to figure how you made it without y-seams and I couldn’t figure it out, so I’m glad I’m not crazy. I am looking forward to making one sometime!
It all makes perfect sense now! Thanks for the great tutorial. I’m away from my stash for a month, but I’ll be making this once I get home!
Thanks for the great tutorial!
Great tutorial and pillow too!
I’ve been looking around for a white/cream bundle and, darn it, it already sold!
Thanks so much for the tutorial! 🙂