I haven’t forgotten about having a link party! I just want to see if a few friends want to help me kick it off. I’ll let you know when we are all ready to play 🙂
Since I don’t have a fun link party, and I have a bunch of things I want to make again and don’t want to forget, I am going to be posting a few tutorials in the next couple of weeks. Some of them, I can’t wait to share with you!
So that next time, I don’t have to reinvent the wheel, I thought I would put up this little tutorial I wrote up. I needed a little gift and I wanted to send something useful. Well, I wanted to send a quilt, but sometimes I have to stop and remind myself ‘anything can be a quilt’. (Thanks, Amanda!) So here is a little not-a-quilt quilt for a precious little girl.
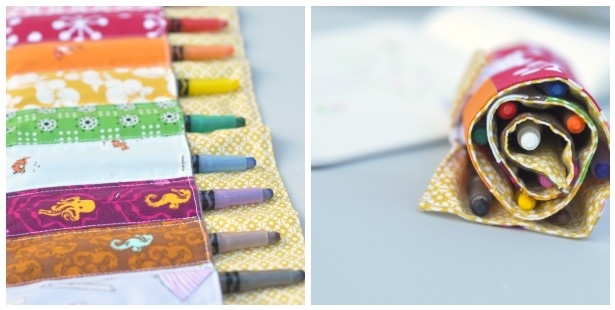
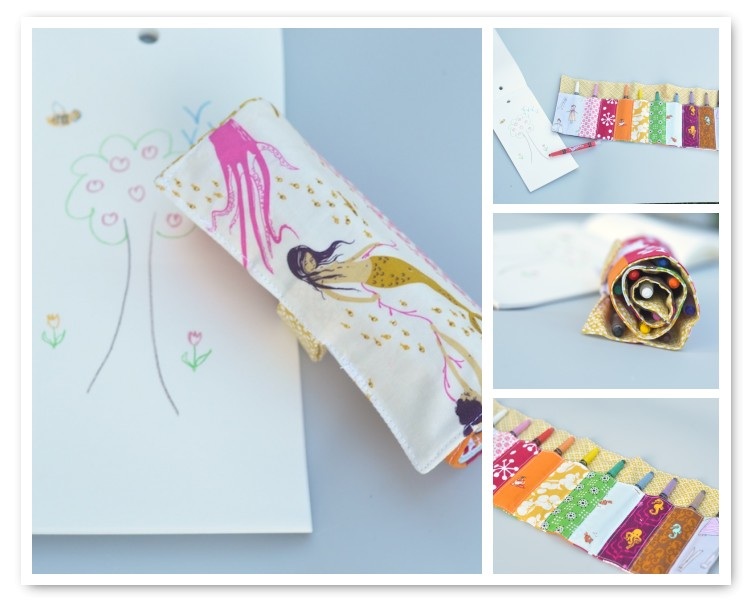
What little one wouldn’t love a special place to keep her crayons? And I love that it will help teach little ones matching as well. My little girl is loving matching right now, so I hope this little crayon roll’s new owner loves it as much as she does 🙂
I made a photo tutorial again, so hopefully this is easy to follow along. It took me about an hour and a half to draft the idea, so this is a quick, instant gratification project.
To make this crayon roll, you will need to gather up a variety of scraps. I used white (grey in the pocket) pink, red, orange, yellow, green, blue, purple, brown and grey (to hold the black crayon). You can always adjust the pattern to factor in extra colors if you like. I also chose to use thin, woven interfacing instead of fusible interfacing. Feel free to use what is comfortable for you.
So, let’s get started? Gather up:
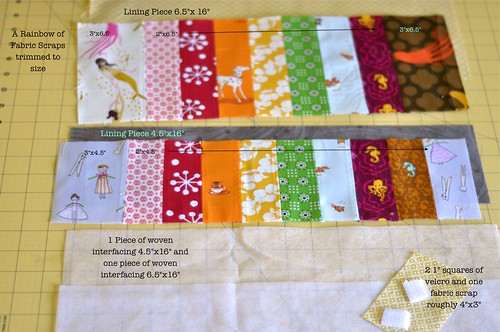
I made the end pieces 3″ on the outside roll to show off the fussycut prints. If you want to, it would be just as easy to make them 2″ and just trim the rest of the pattern down to the new size.
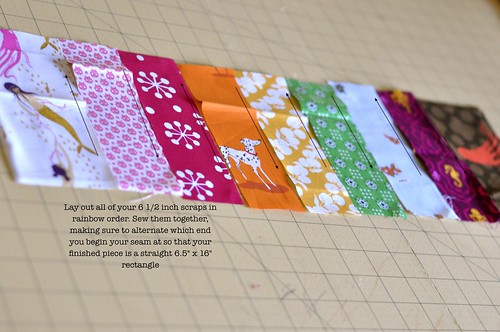
Sew the strip, then
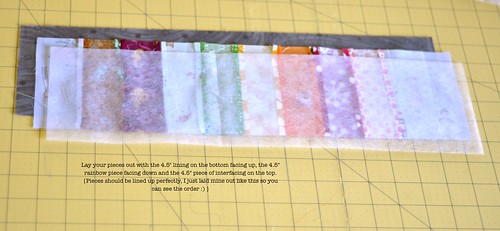
Layer your inside pocket pieces like the photo above, only lined up perfectly,
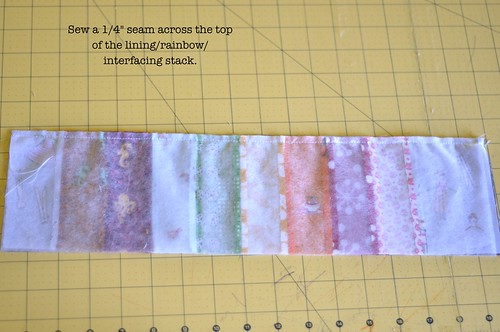
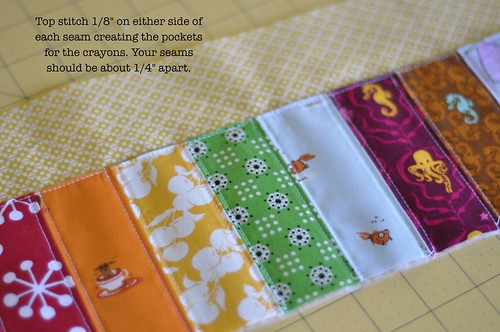
Sew a 1/4″ seam across the TOP of the pocket piece
 ]
]
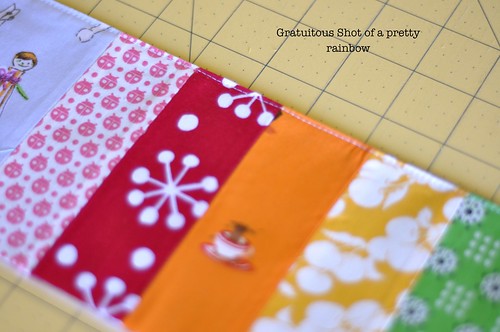
These are some of ‘my precious’ fabrics. They are pieces I have been hoarding a long time. So bear with my while I enjoy how they all look together…
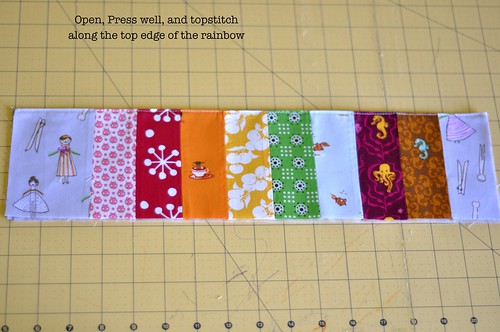
All right, let’s keep going
Then,
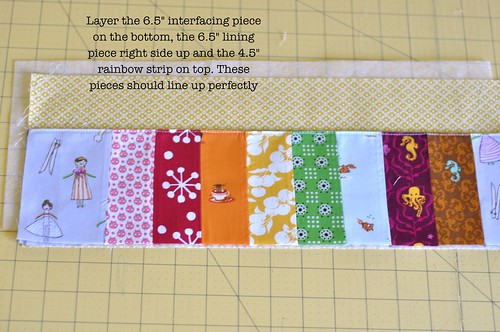
Doesn’t this not a quilt look very quilty at this point?
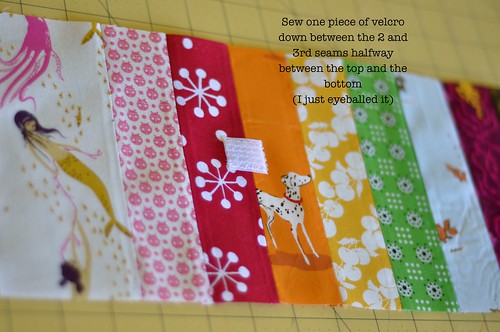
Just as a note, I chose to put a very small piece of interfacing behind the rainbow piece to reinforce the velcro. I would recommend that, but it is absolutely not required for it to work. You could also use a small scrap of 1.5″ square fabric.

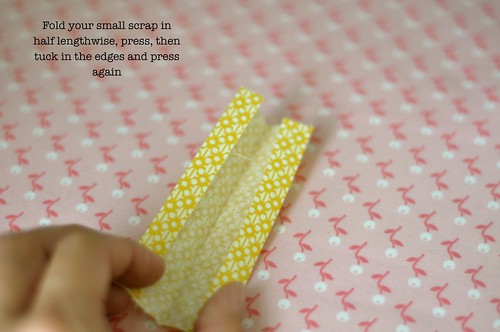
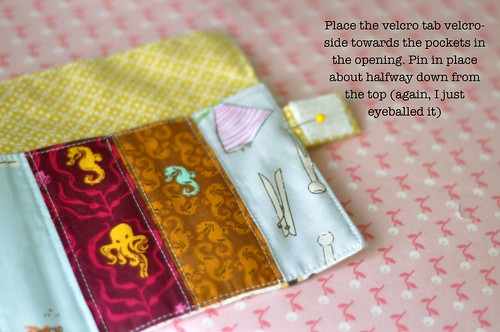
Now we are going to make the tab for the velcro. I chose velcro because my daughter’s little fingers can do it ‘all myself, Mommy!’ And heaven knows that right now Abby wants to do everything herself (insert deep breath)
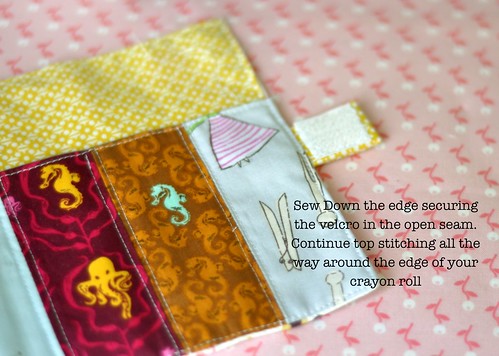
Sew the tab closed on the open side. Then, you are going to pinch your tab in half to give you a line to line up your velcro. Lay the tab piece flat and line the velcro square up with the pinched line. Sew it down.
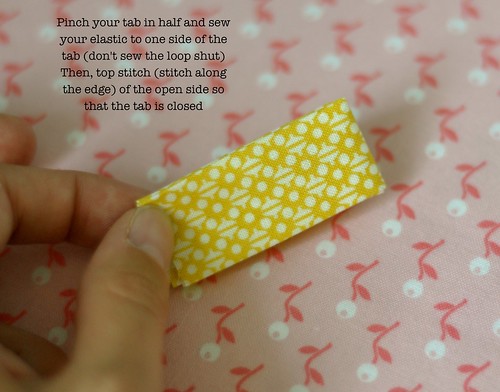
I had a hard time explaining this part in words, so let me know if you need a picture of how I attached the velcro but left the ‘loop’. You could run a keychain through the loop and hang it on a backpack or bag strap to keep it with you when you go out.
Almost done!
Ta da! You have a very cute little gift or just a fun way to keep crayons organized. I made mine the size for the twistable crayons since those don’t break into million itty bitty pieces all the time. These are perfect to keep in your purse to keep little ones occupied while you are out to eat, waiting at the Dr’s office or trying to actually hear what is being spoken about in church.
If you do make it, like always, I would love to see it! Happy Sewing!

I can’t tell you how much I love the way this turned out! The fabrics you used are adorable!!
Great tutorial. Thanks for sharing!
Gorgeous! Definitely going to try one myself.
Out of curiosity (and if you don’t mind my asking), where oh where did you find the adorable mermaid fabric? I think I’m in love with it! Tia x