Good Afternoon, Everyone! Thank you so much for quilting along! I went back and adjusted the previous post to include the total number of diamonds (at least 300). I would recommend making extras so you have a bit of extras to make sure you can vary the prints around the quilt. You can always use extras in the backing or a pillow.
Today we are going to start stitching! All of the stitching for the examples was done on a machine, but this could easily be done by hand if you are happier with that. To start, lay out your diamonds. If you are doing an every-other layout, you may want to pair all of your starflower prints/solids ahead of time, or you can do it as you go along. I highly recommend chain piecing the sewing part of this 🙂
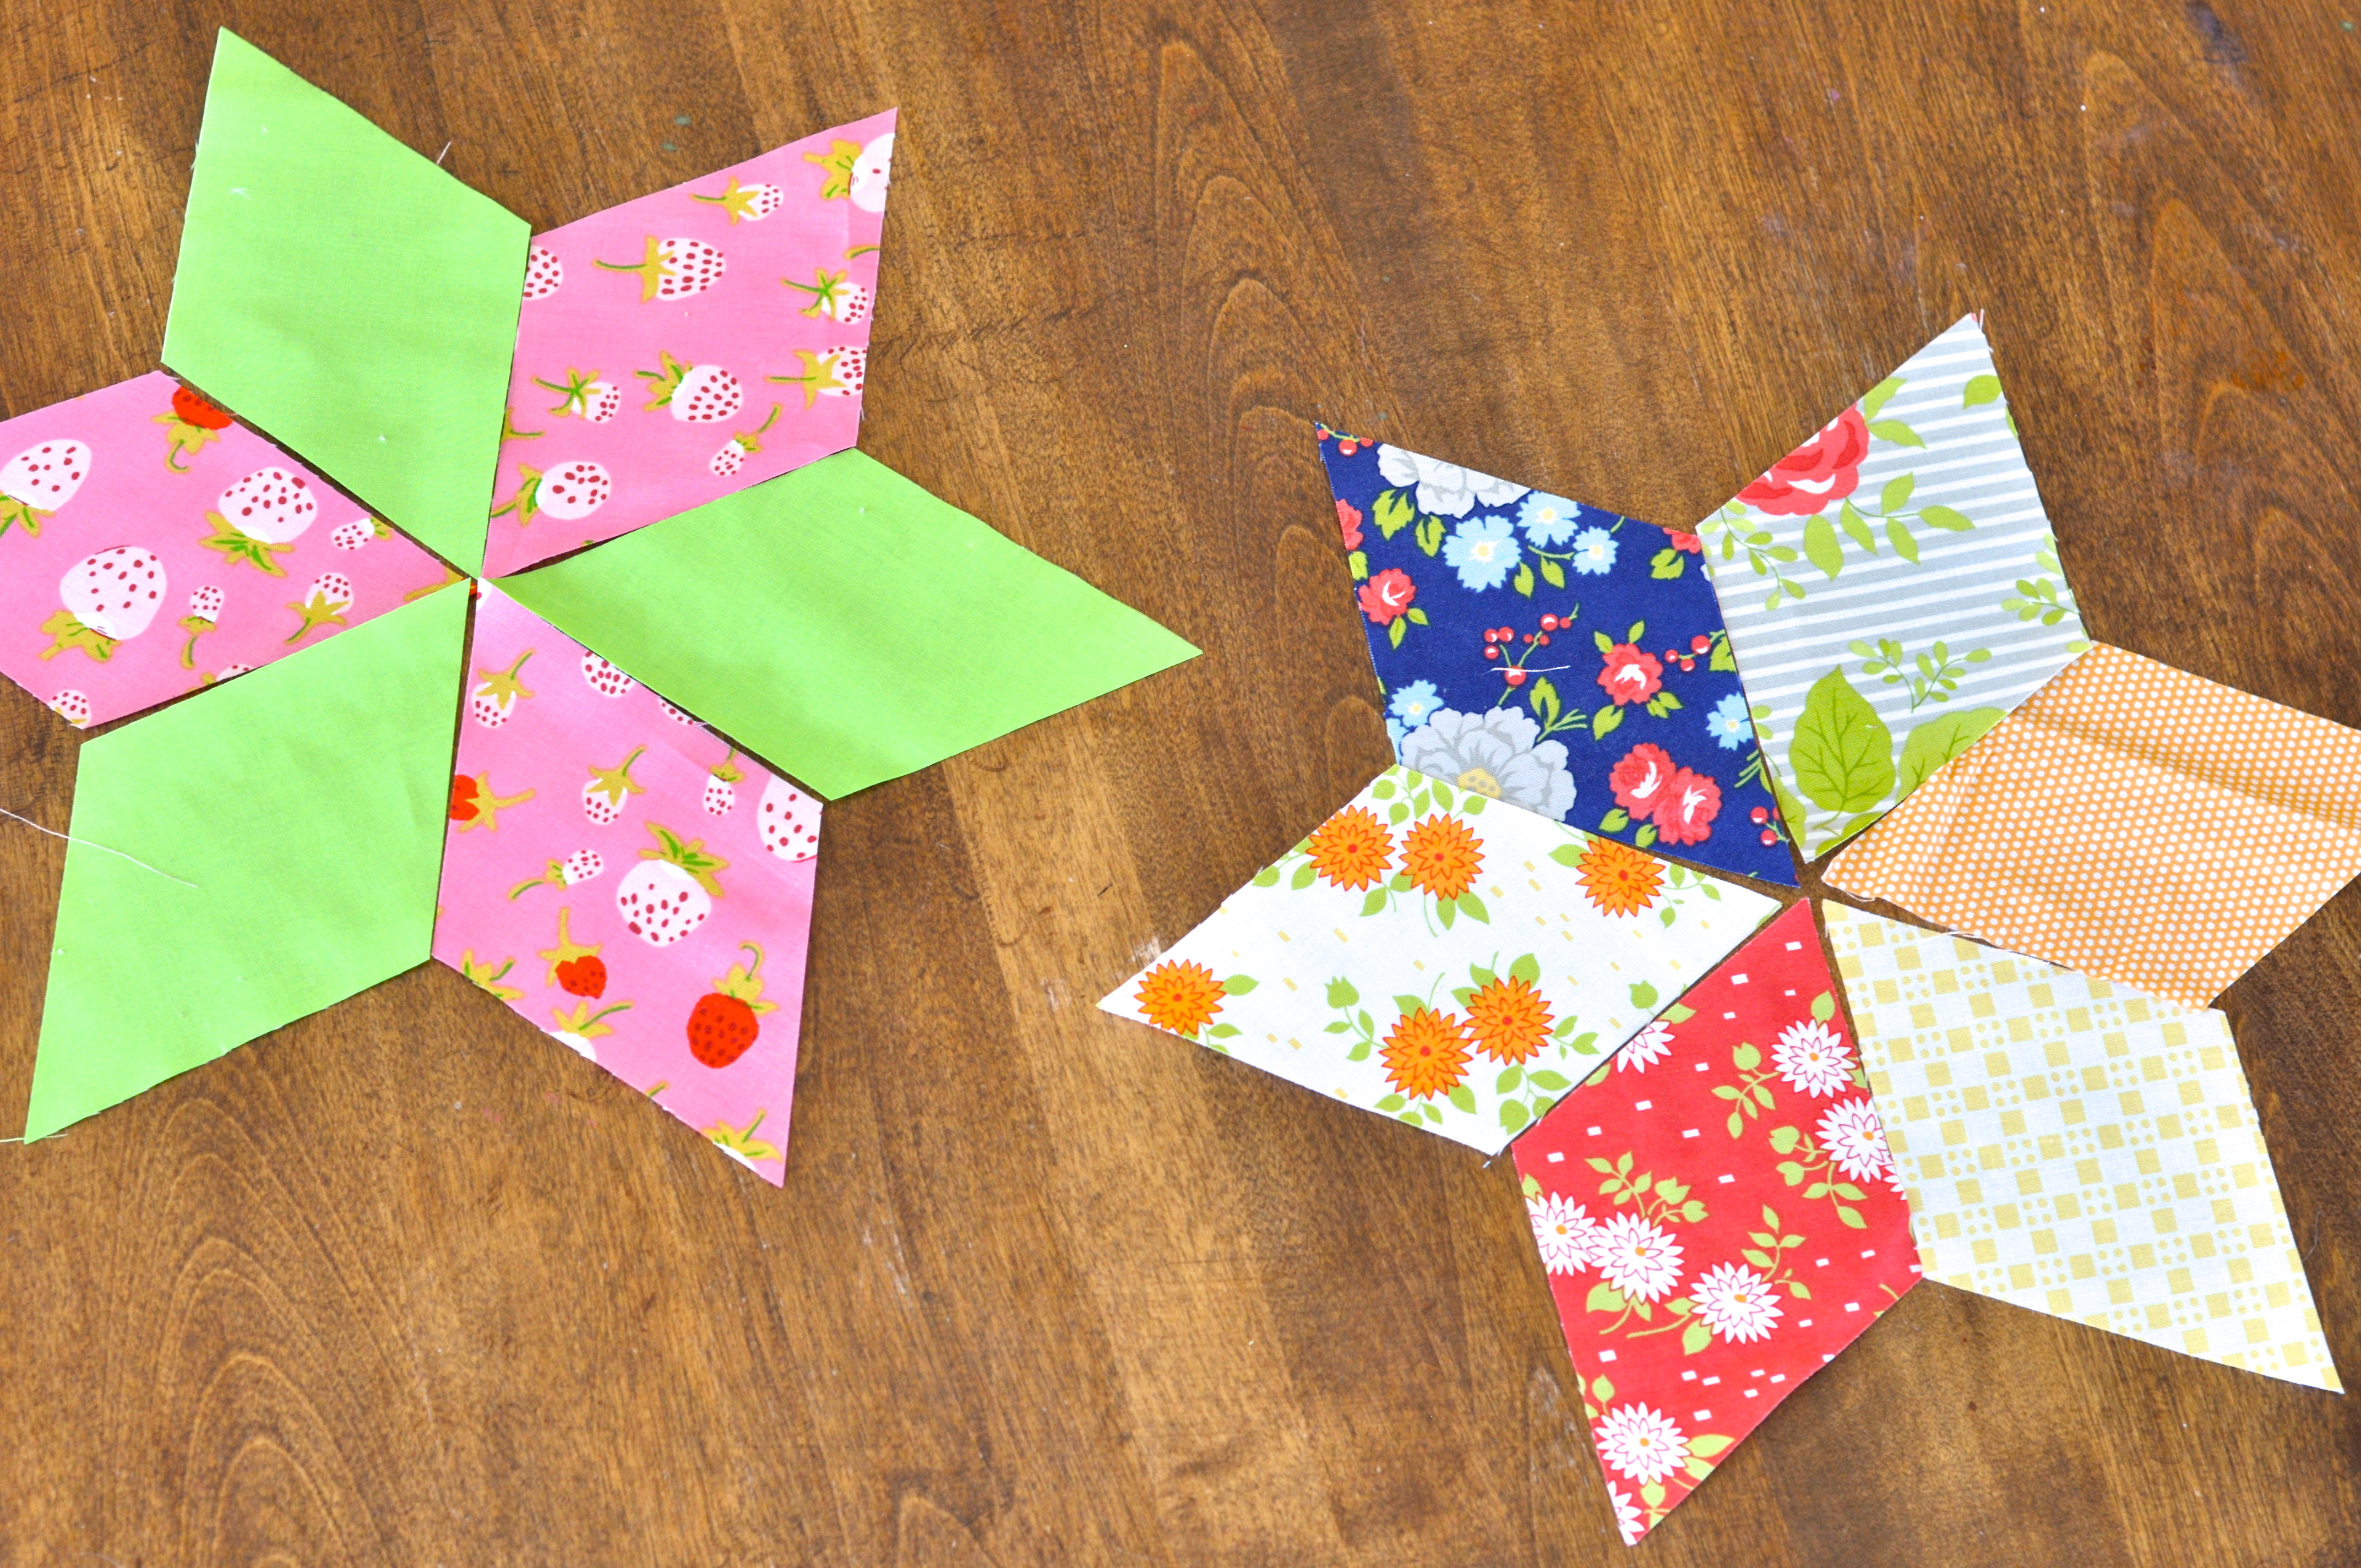
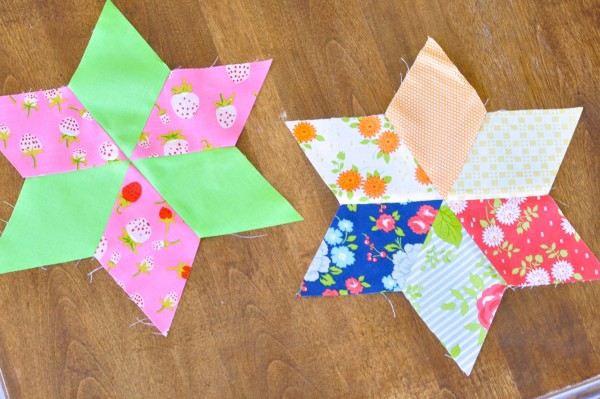
To start, layout six diamonds into star flowers. I am showing a scrappy layout where you will need 6 different prints and the every-other where you will need three diamonds of solids and 3 diamonds of prints.
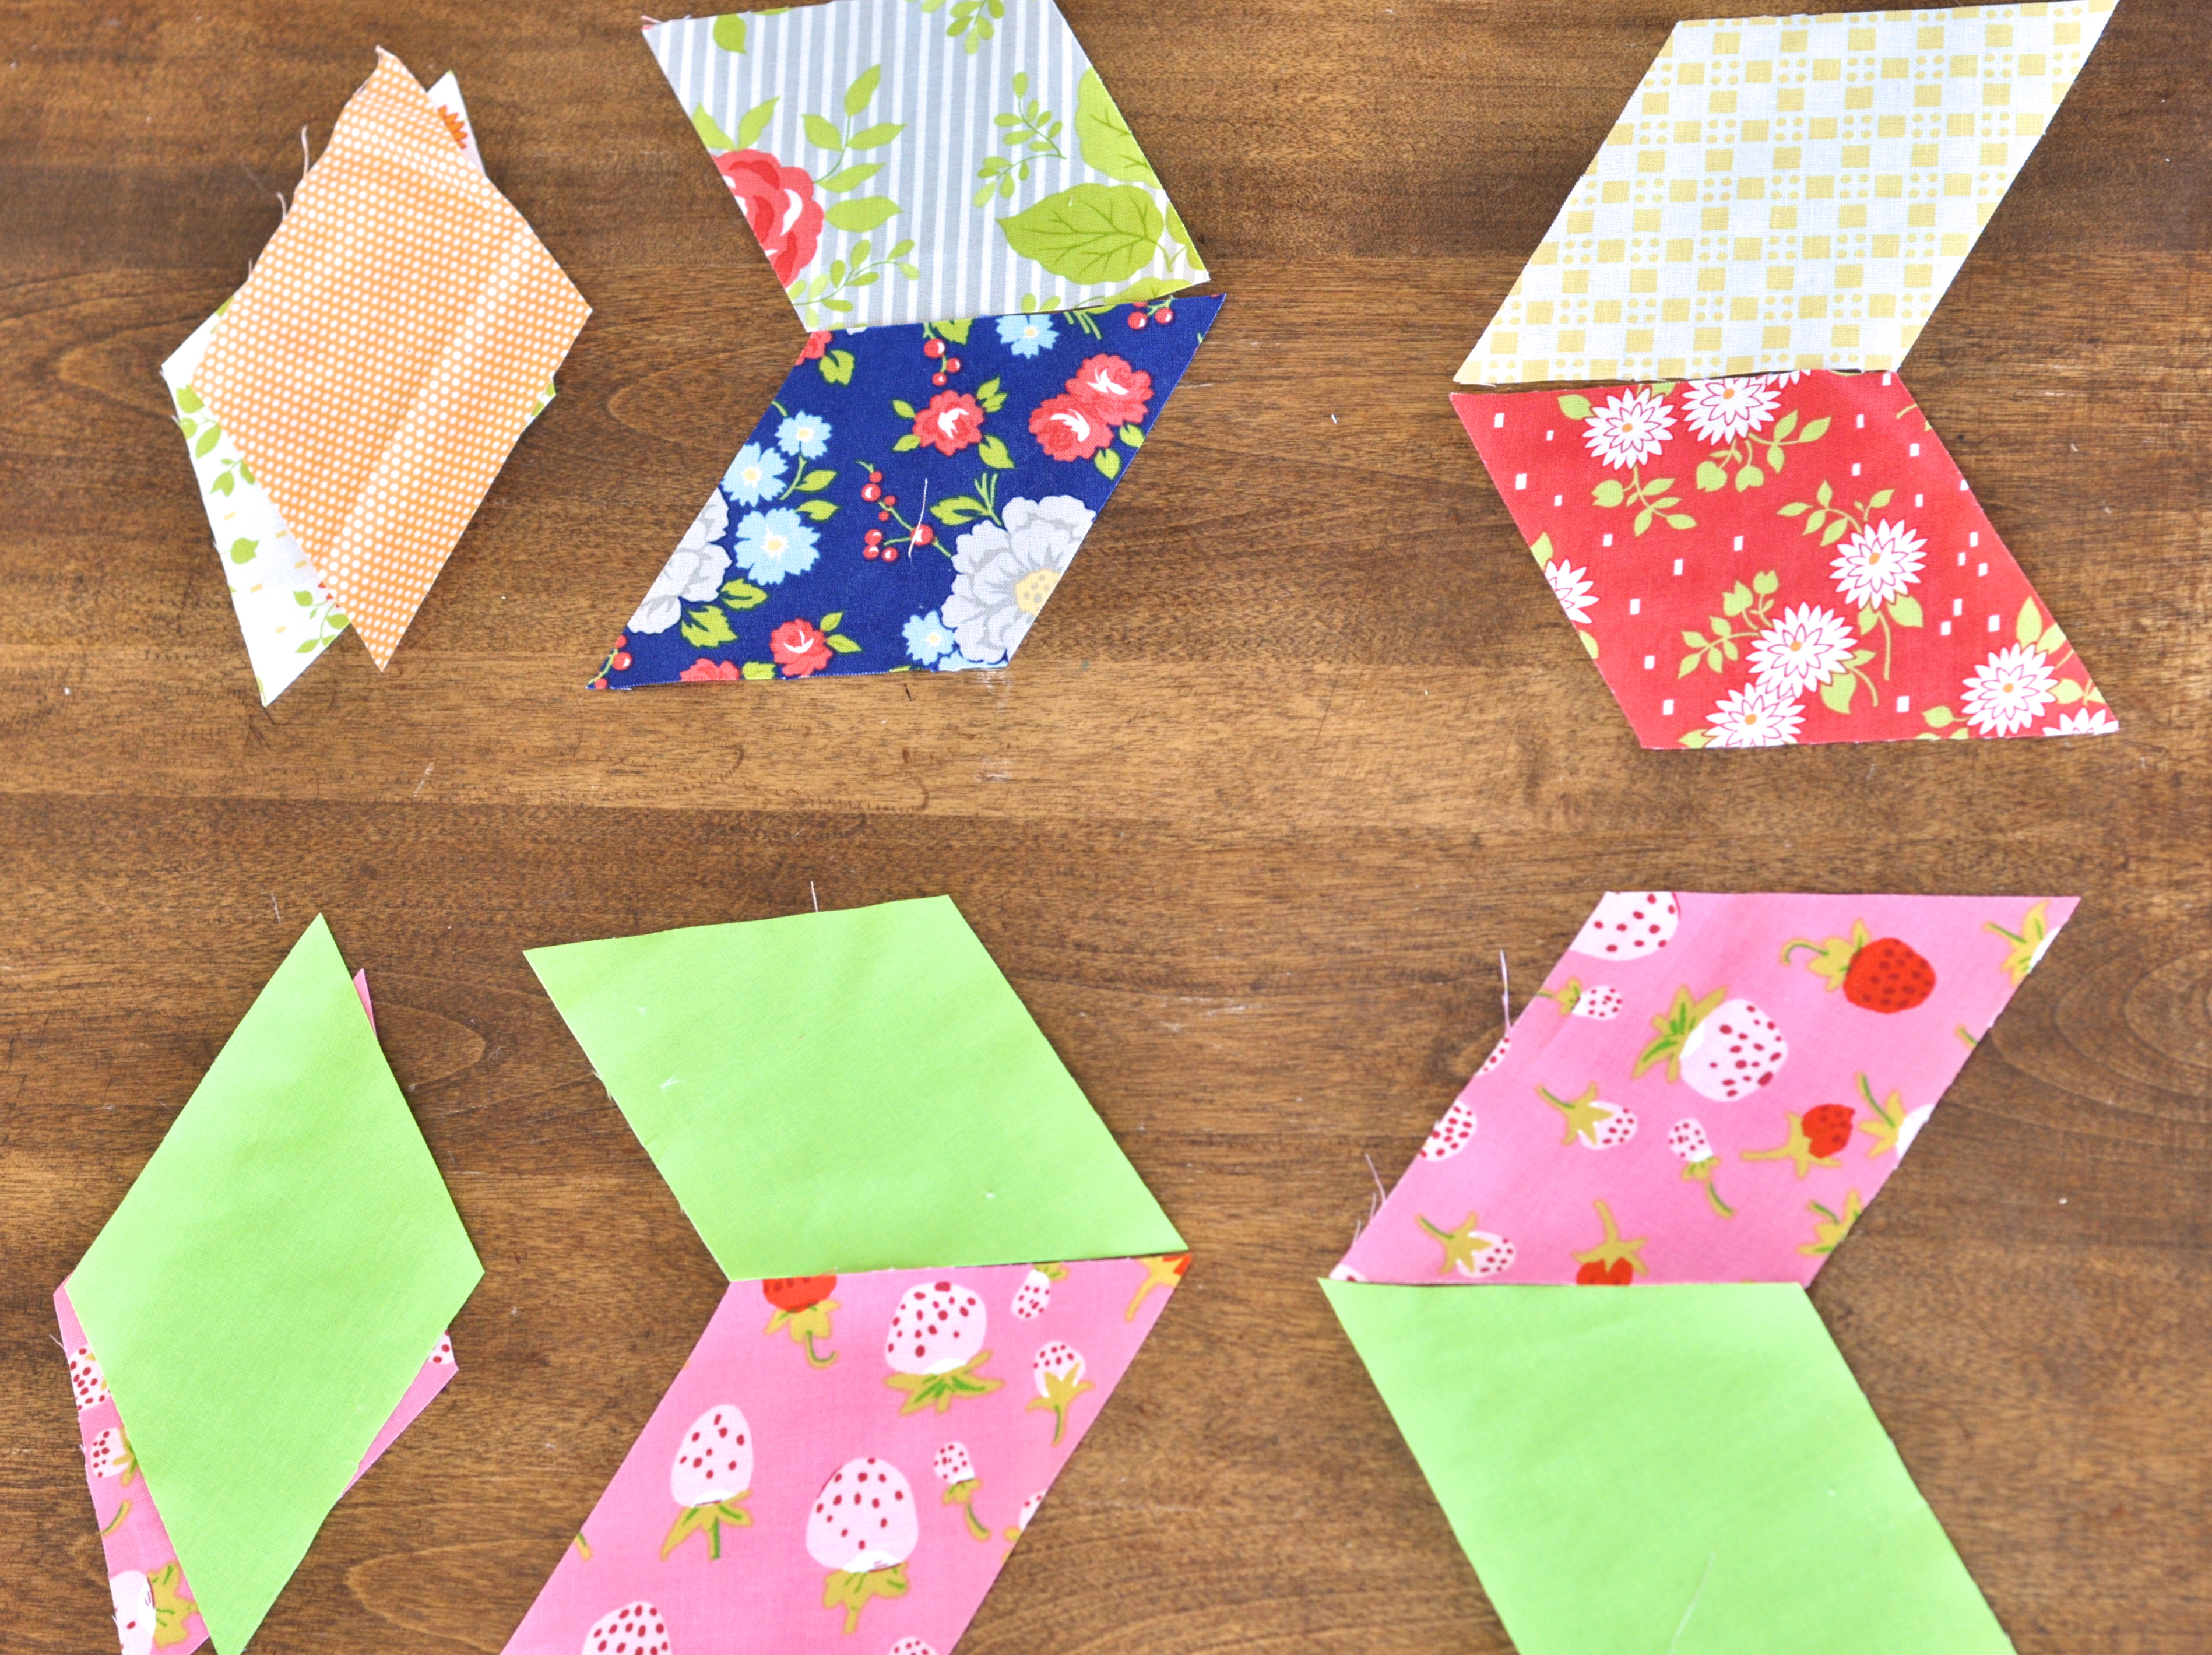
Next, set aside the third diamond from each set (I set aside the top from the left half and the bottom from the right half if you are using the every-other method, just to keep them straight. I let the scrappy ones fall where they may :))
Repeat each of the following steps for each half of the star flower.
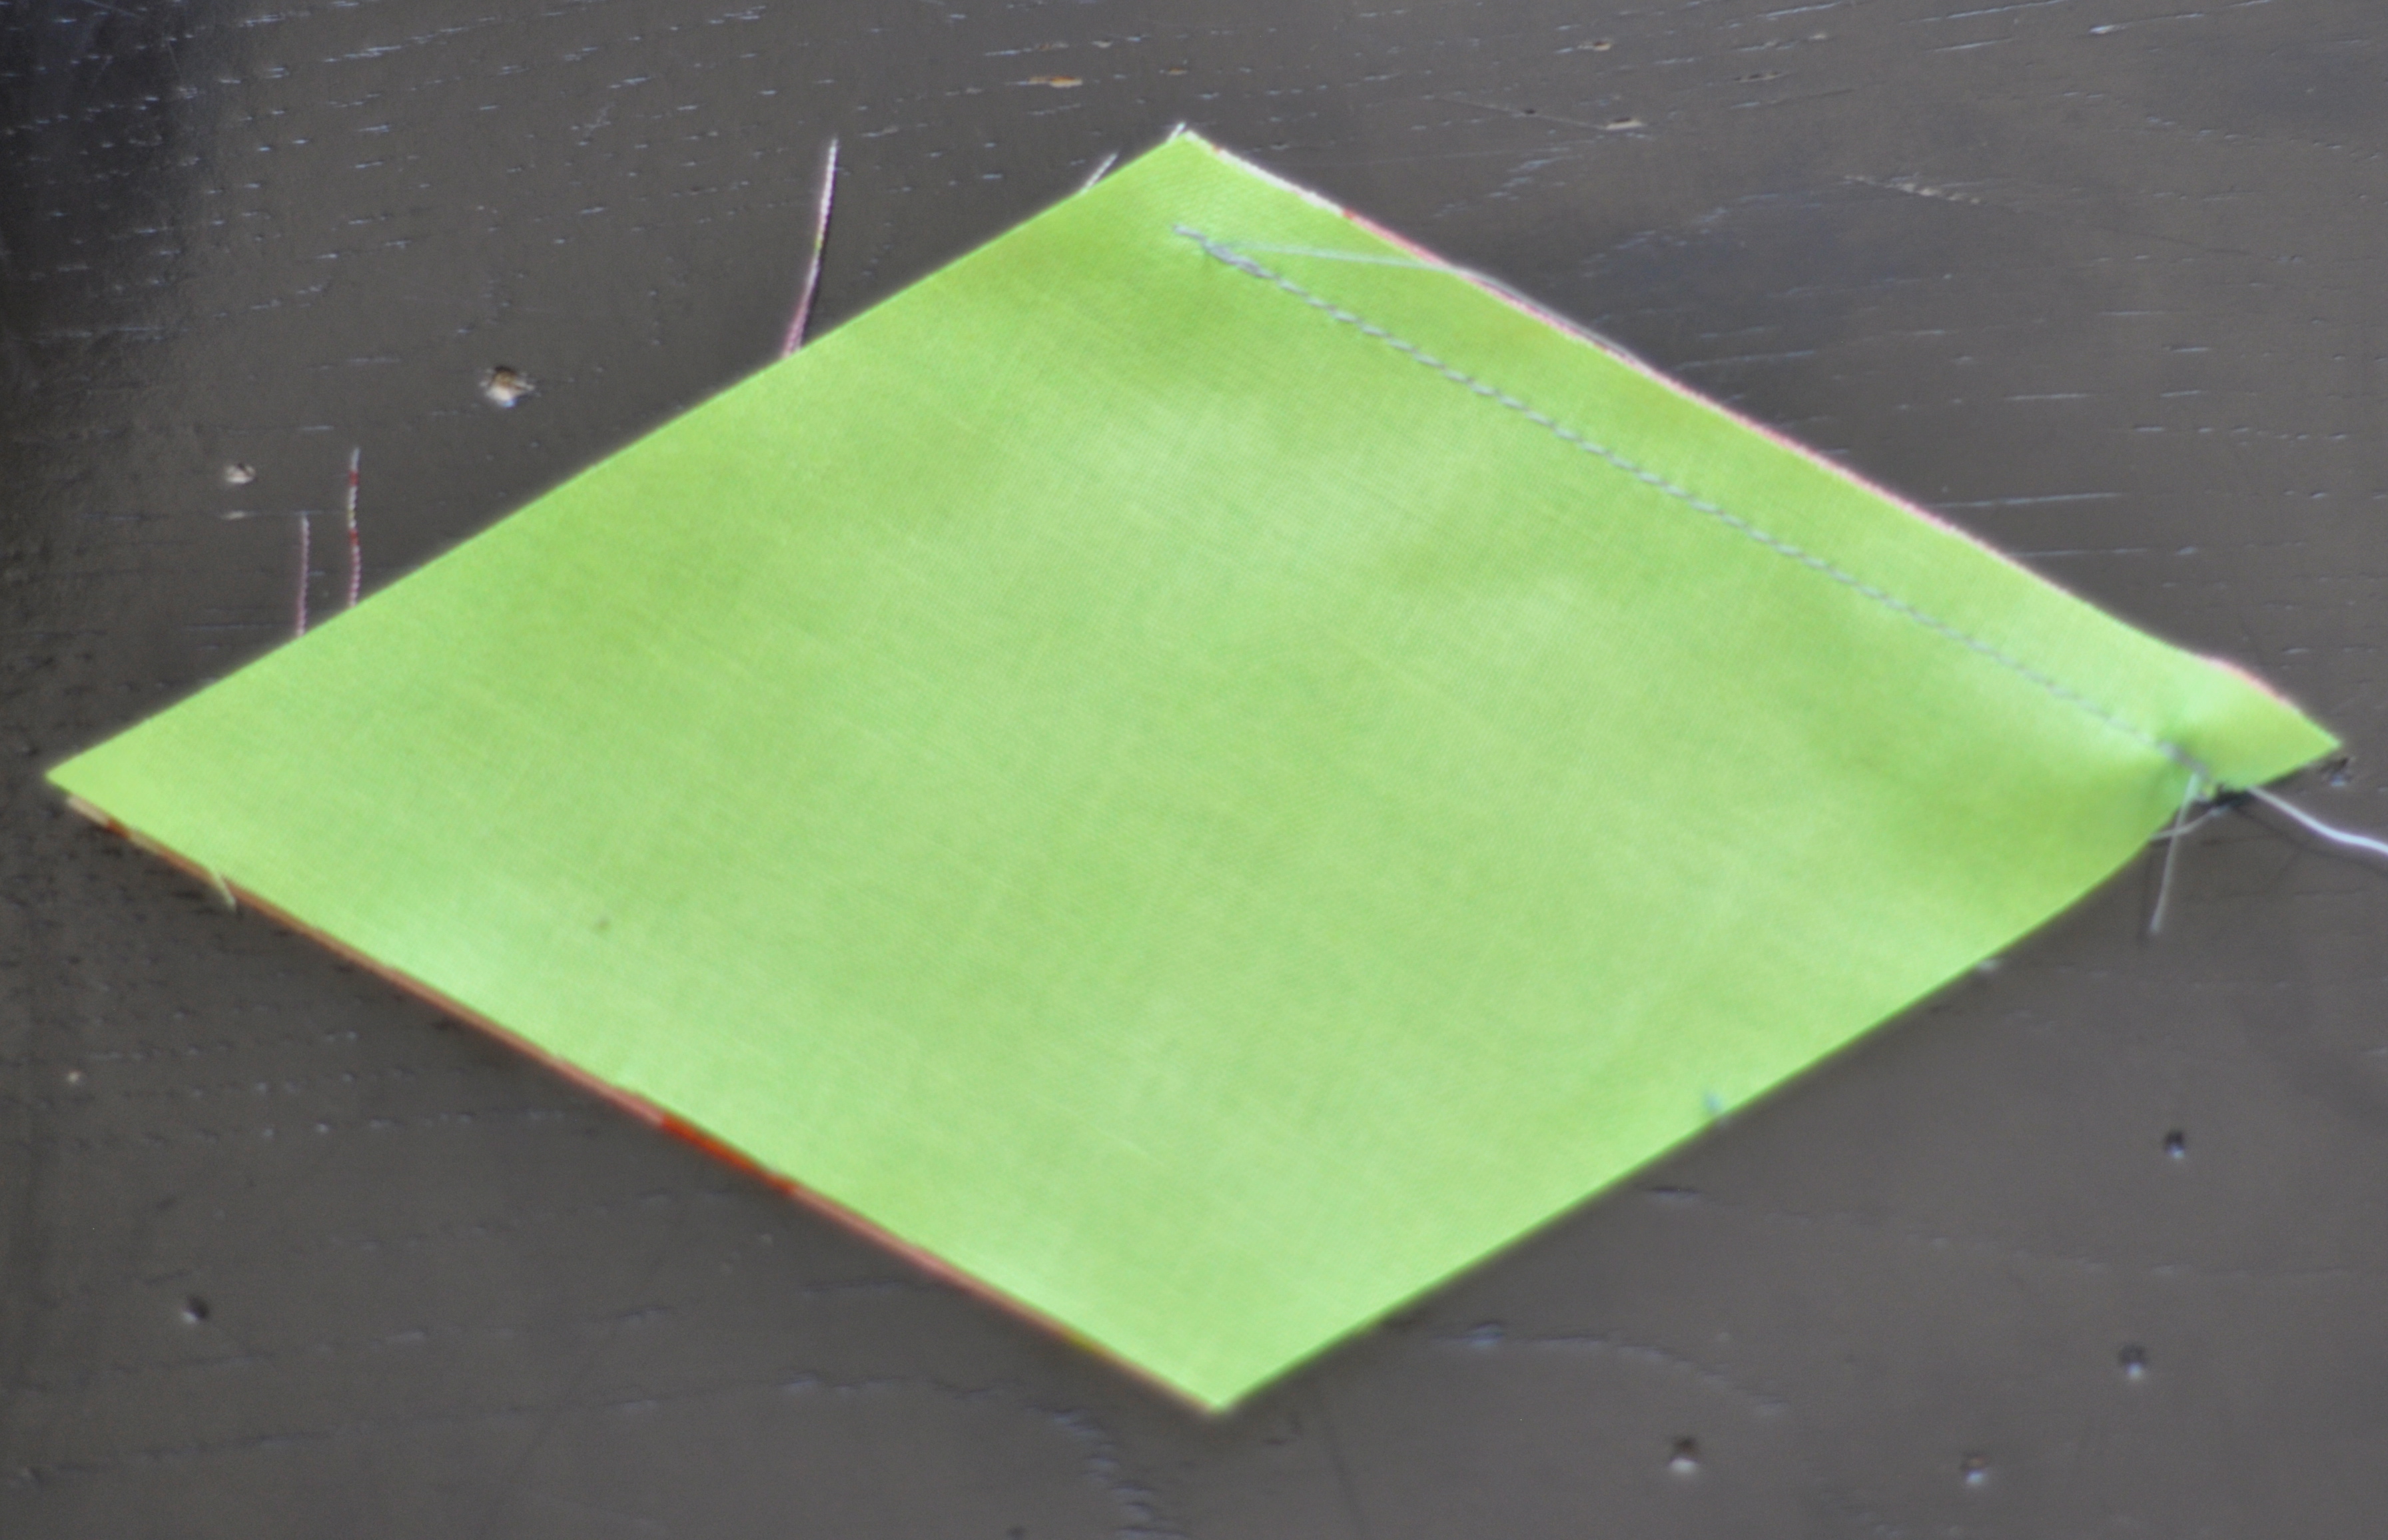
You are going to sew a seam that starts 1/4″ from the obtuse edge of the diamond pairs and goes all the way to the edge of the acute edge of the diamond. I’ve drawn this out on a pair of diamonds to make it more clear.
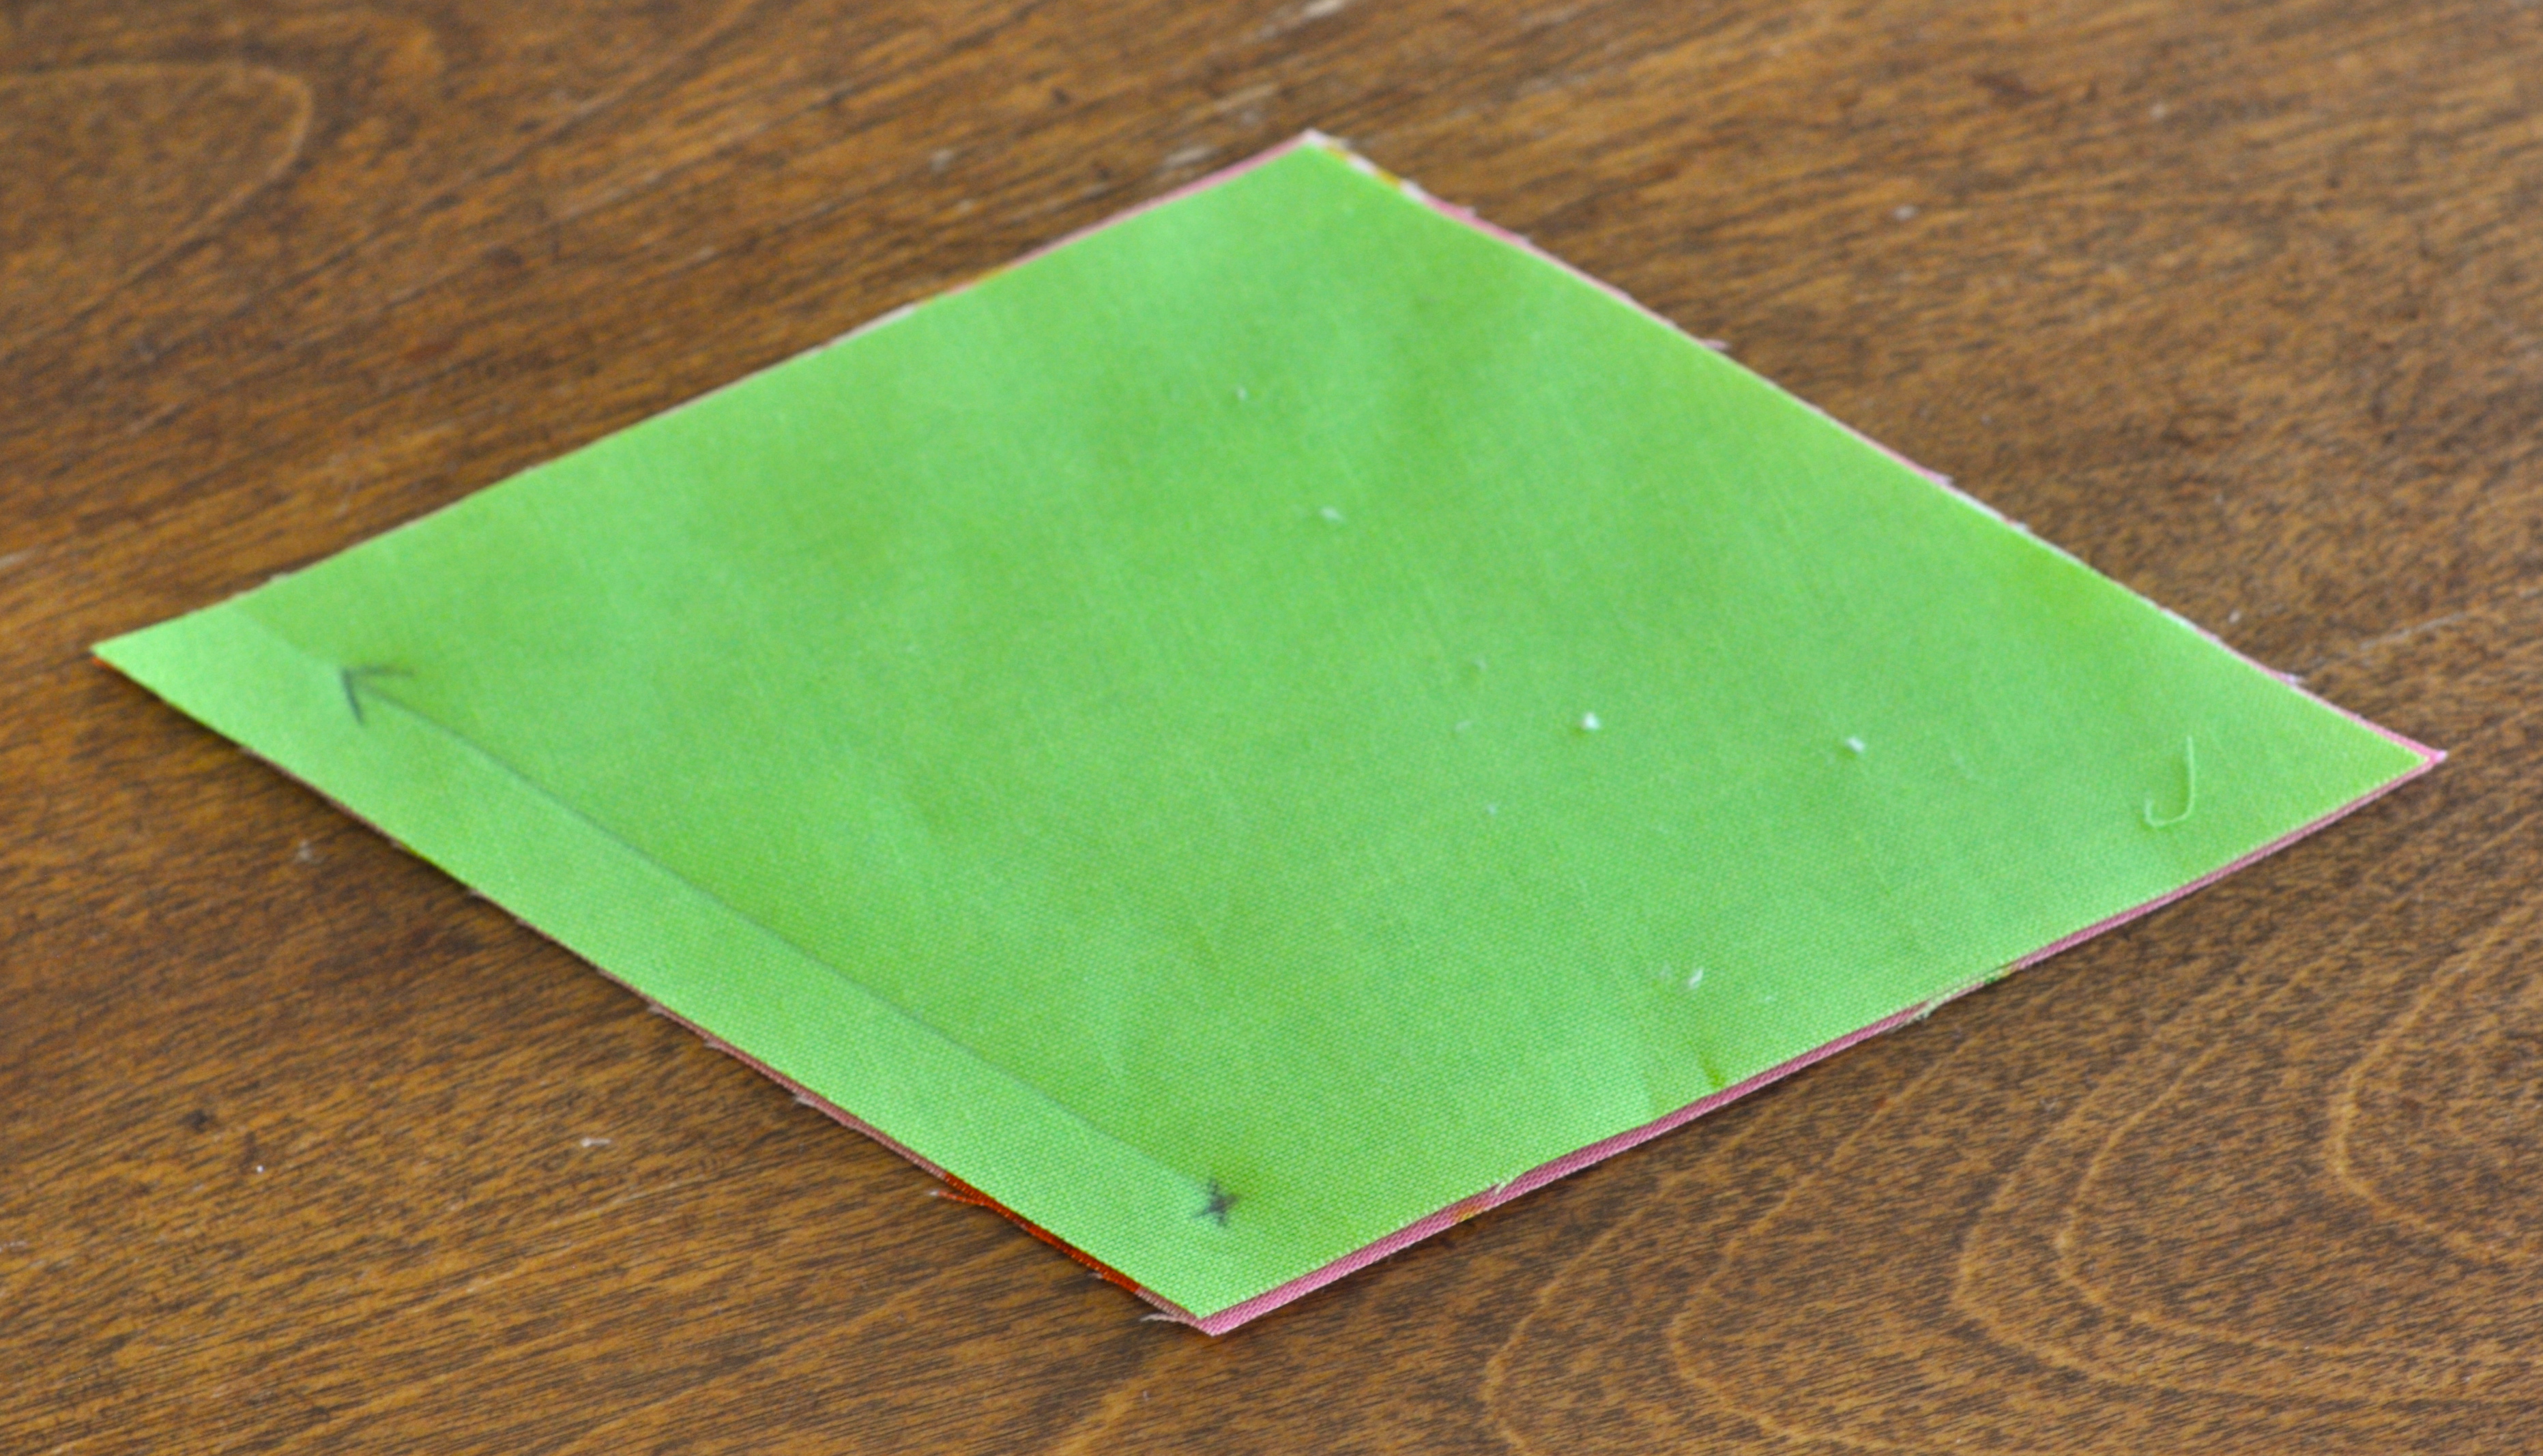
I start sewing at the ‘x’ on the obtuse side so I don’t forget and accidentally sew too far. If you feel more comfortable marking each set, please feel free, but I think once you do it once or twice, you will feel pretty comfortable eyeballing it.
Finger Press your seams open as you go. Fingernails are amazing time savers at this point. If you prefer to press, that would work too.
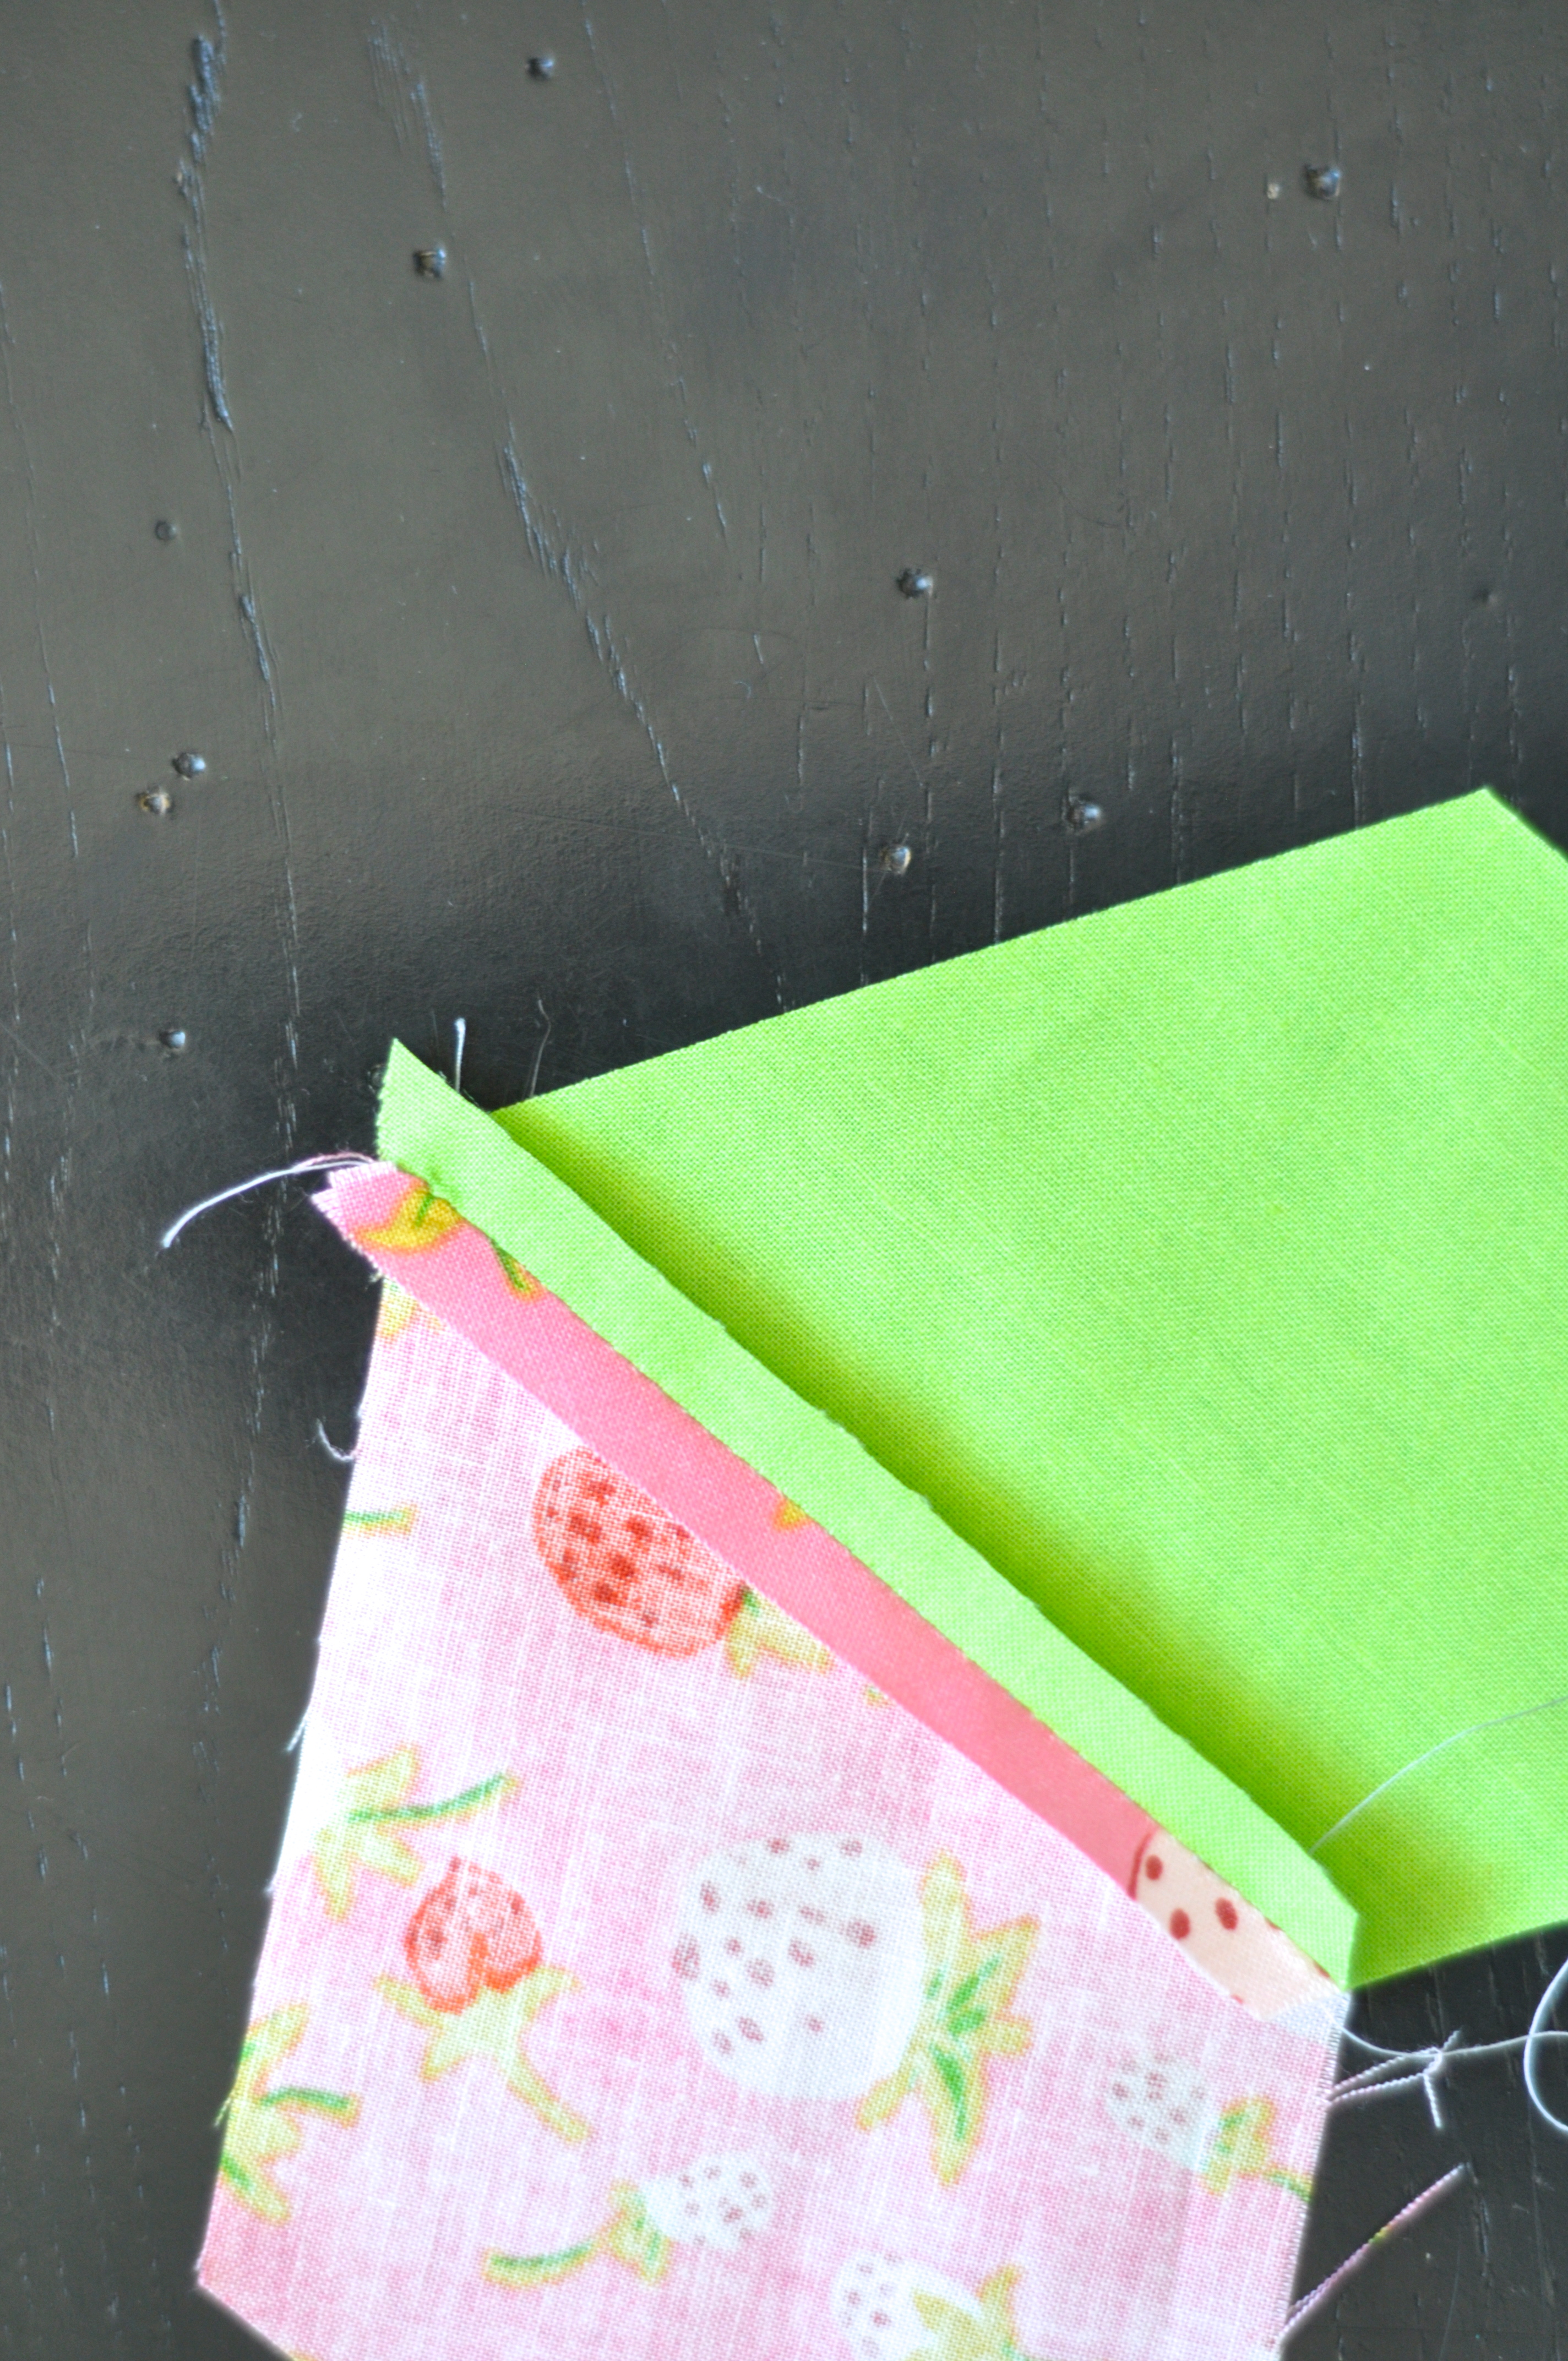
Add a third diamond to each set of pairs. Make sure that the seam is sewn so that the prints/solids alternate. You will start (As before) 1/4″ from the obtuse side of the diamond and sew all the way to the acute edge.
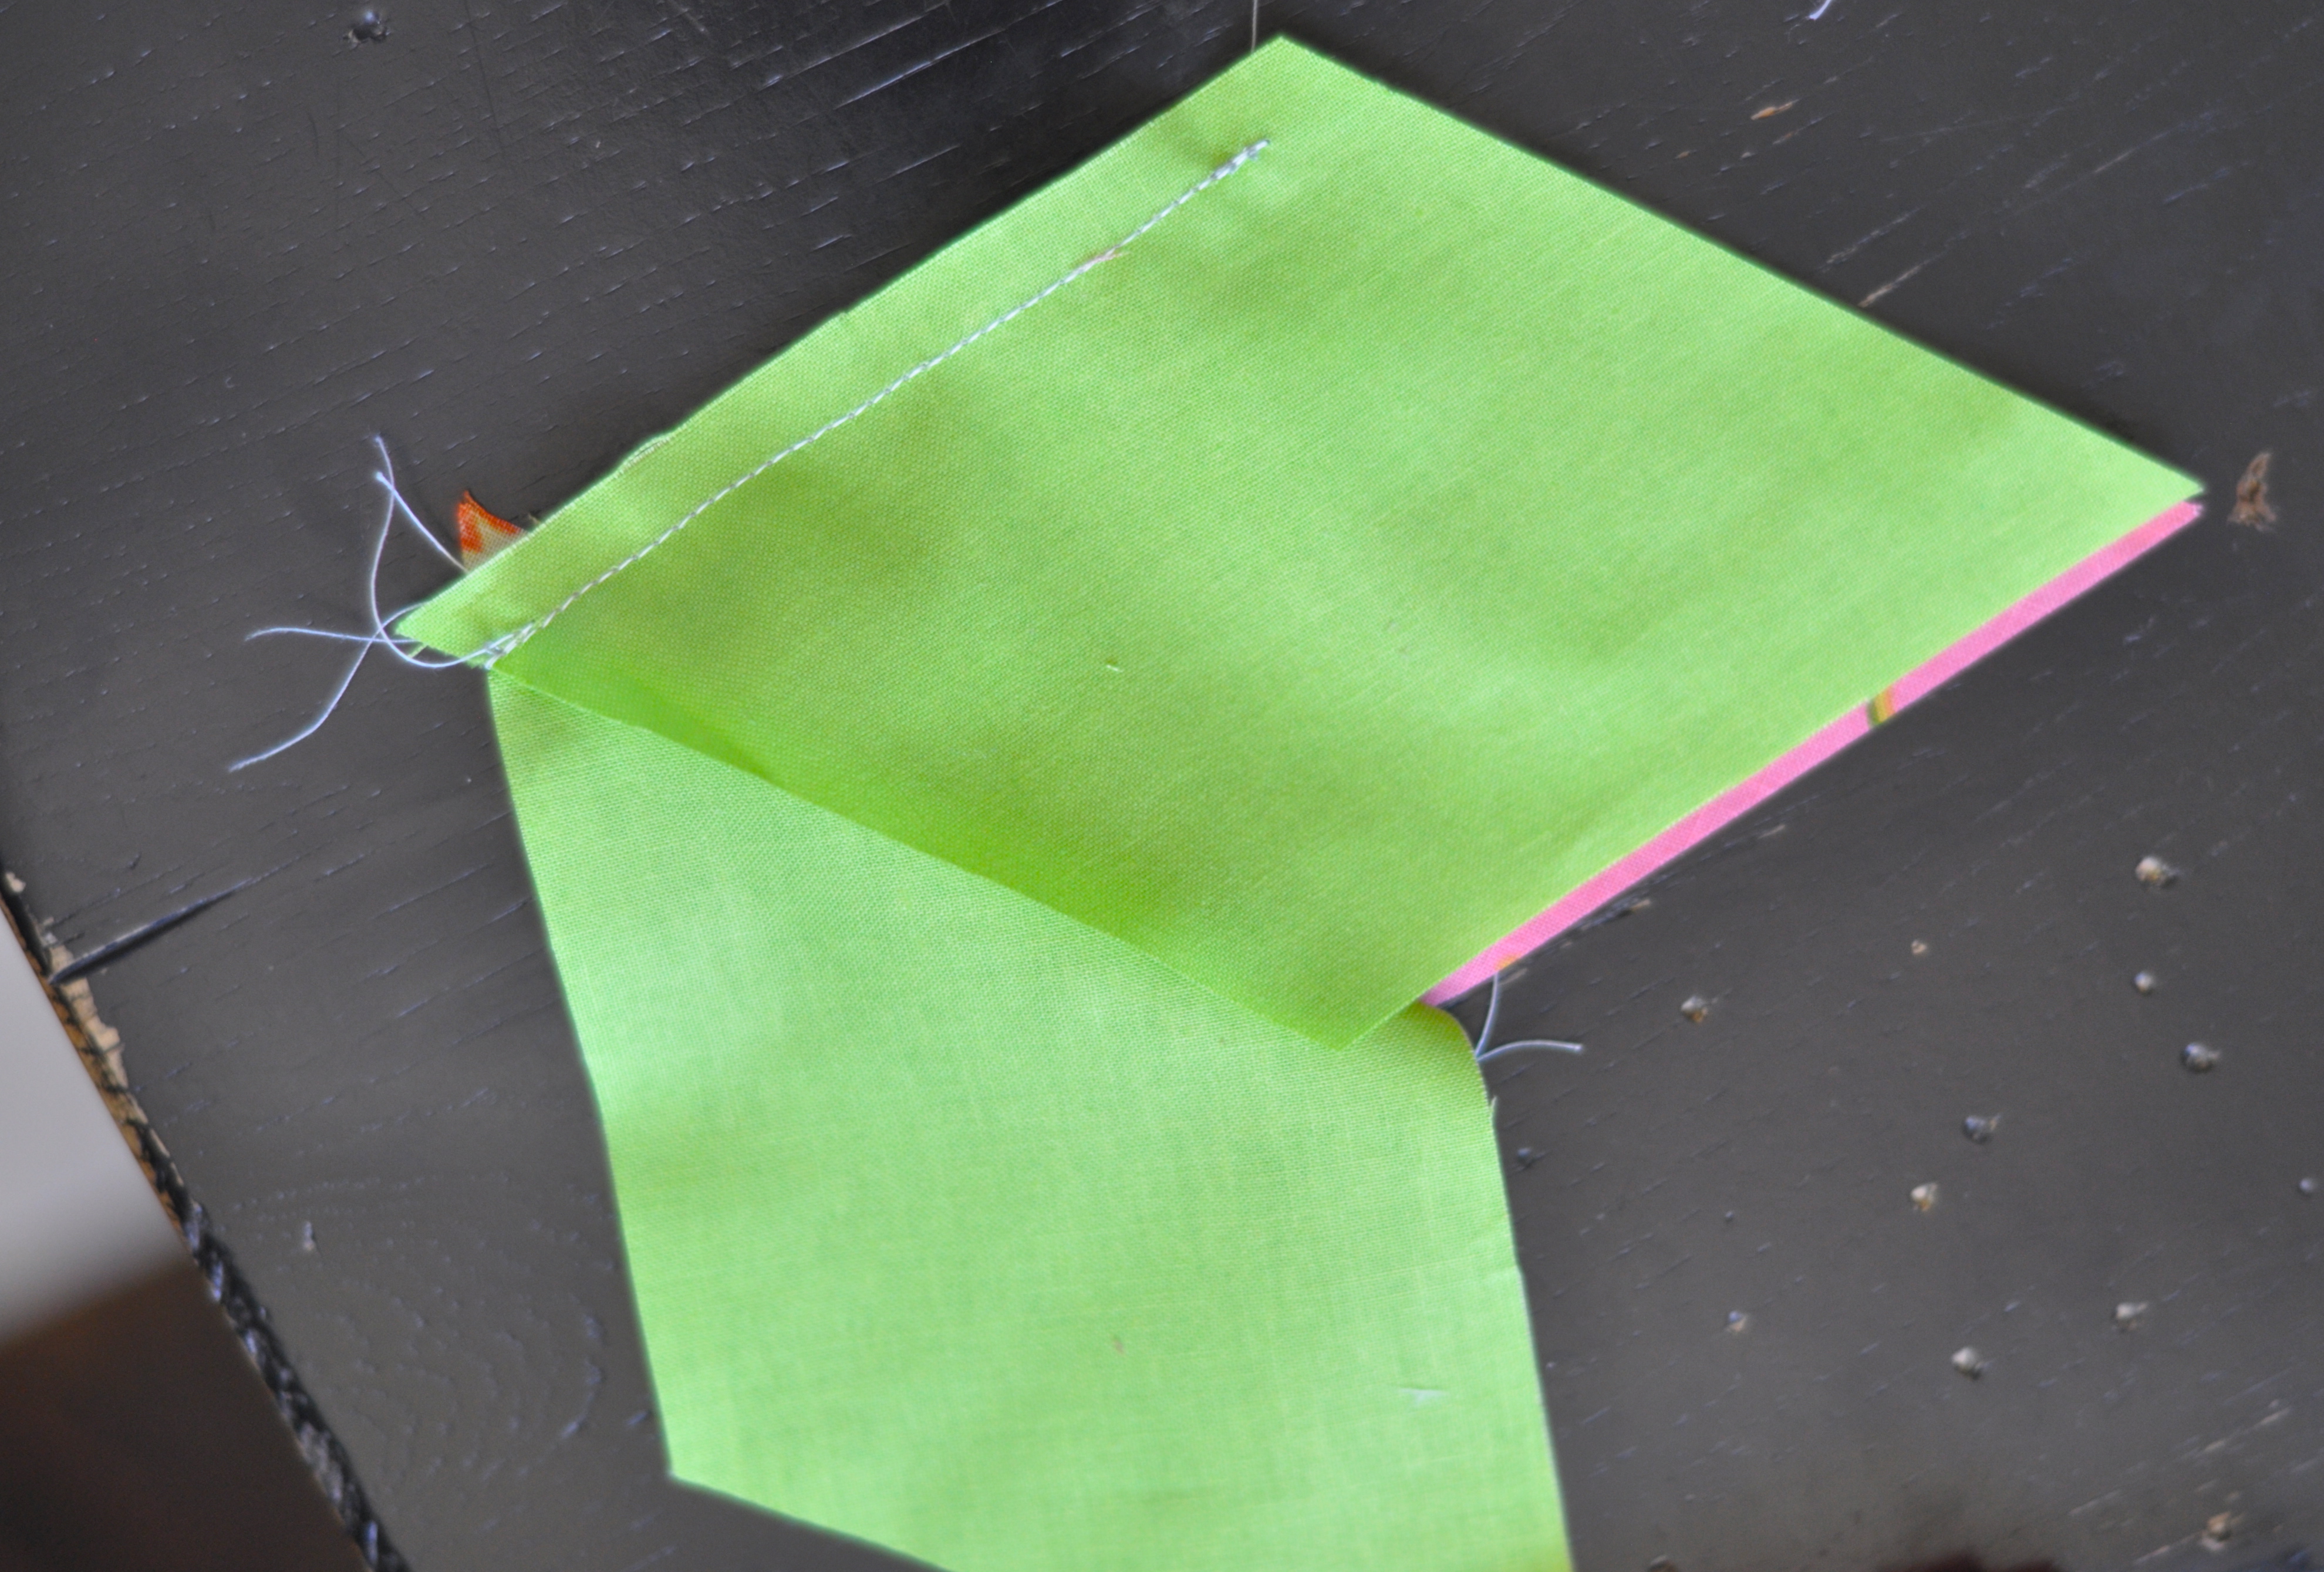
Finger press this seam to the outside new diamond. You should have a little extra corner hanging over the edge of the half-star flower.
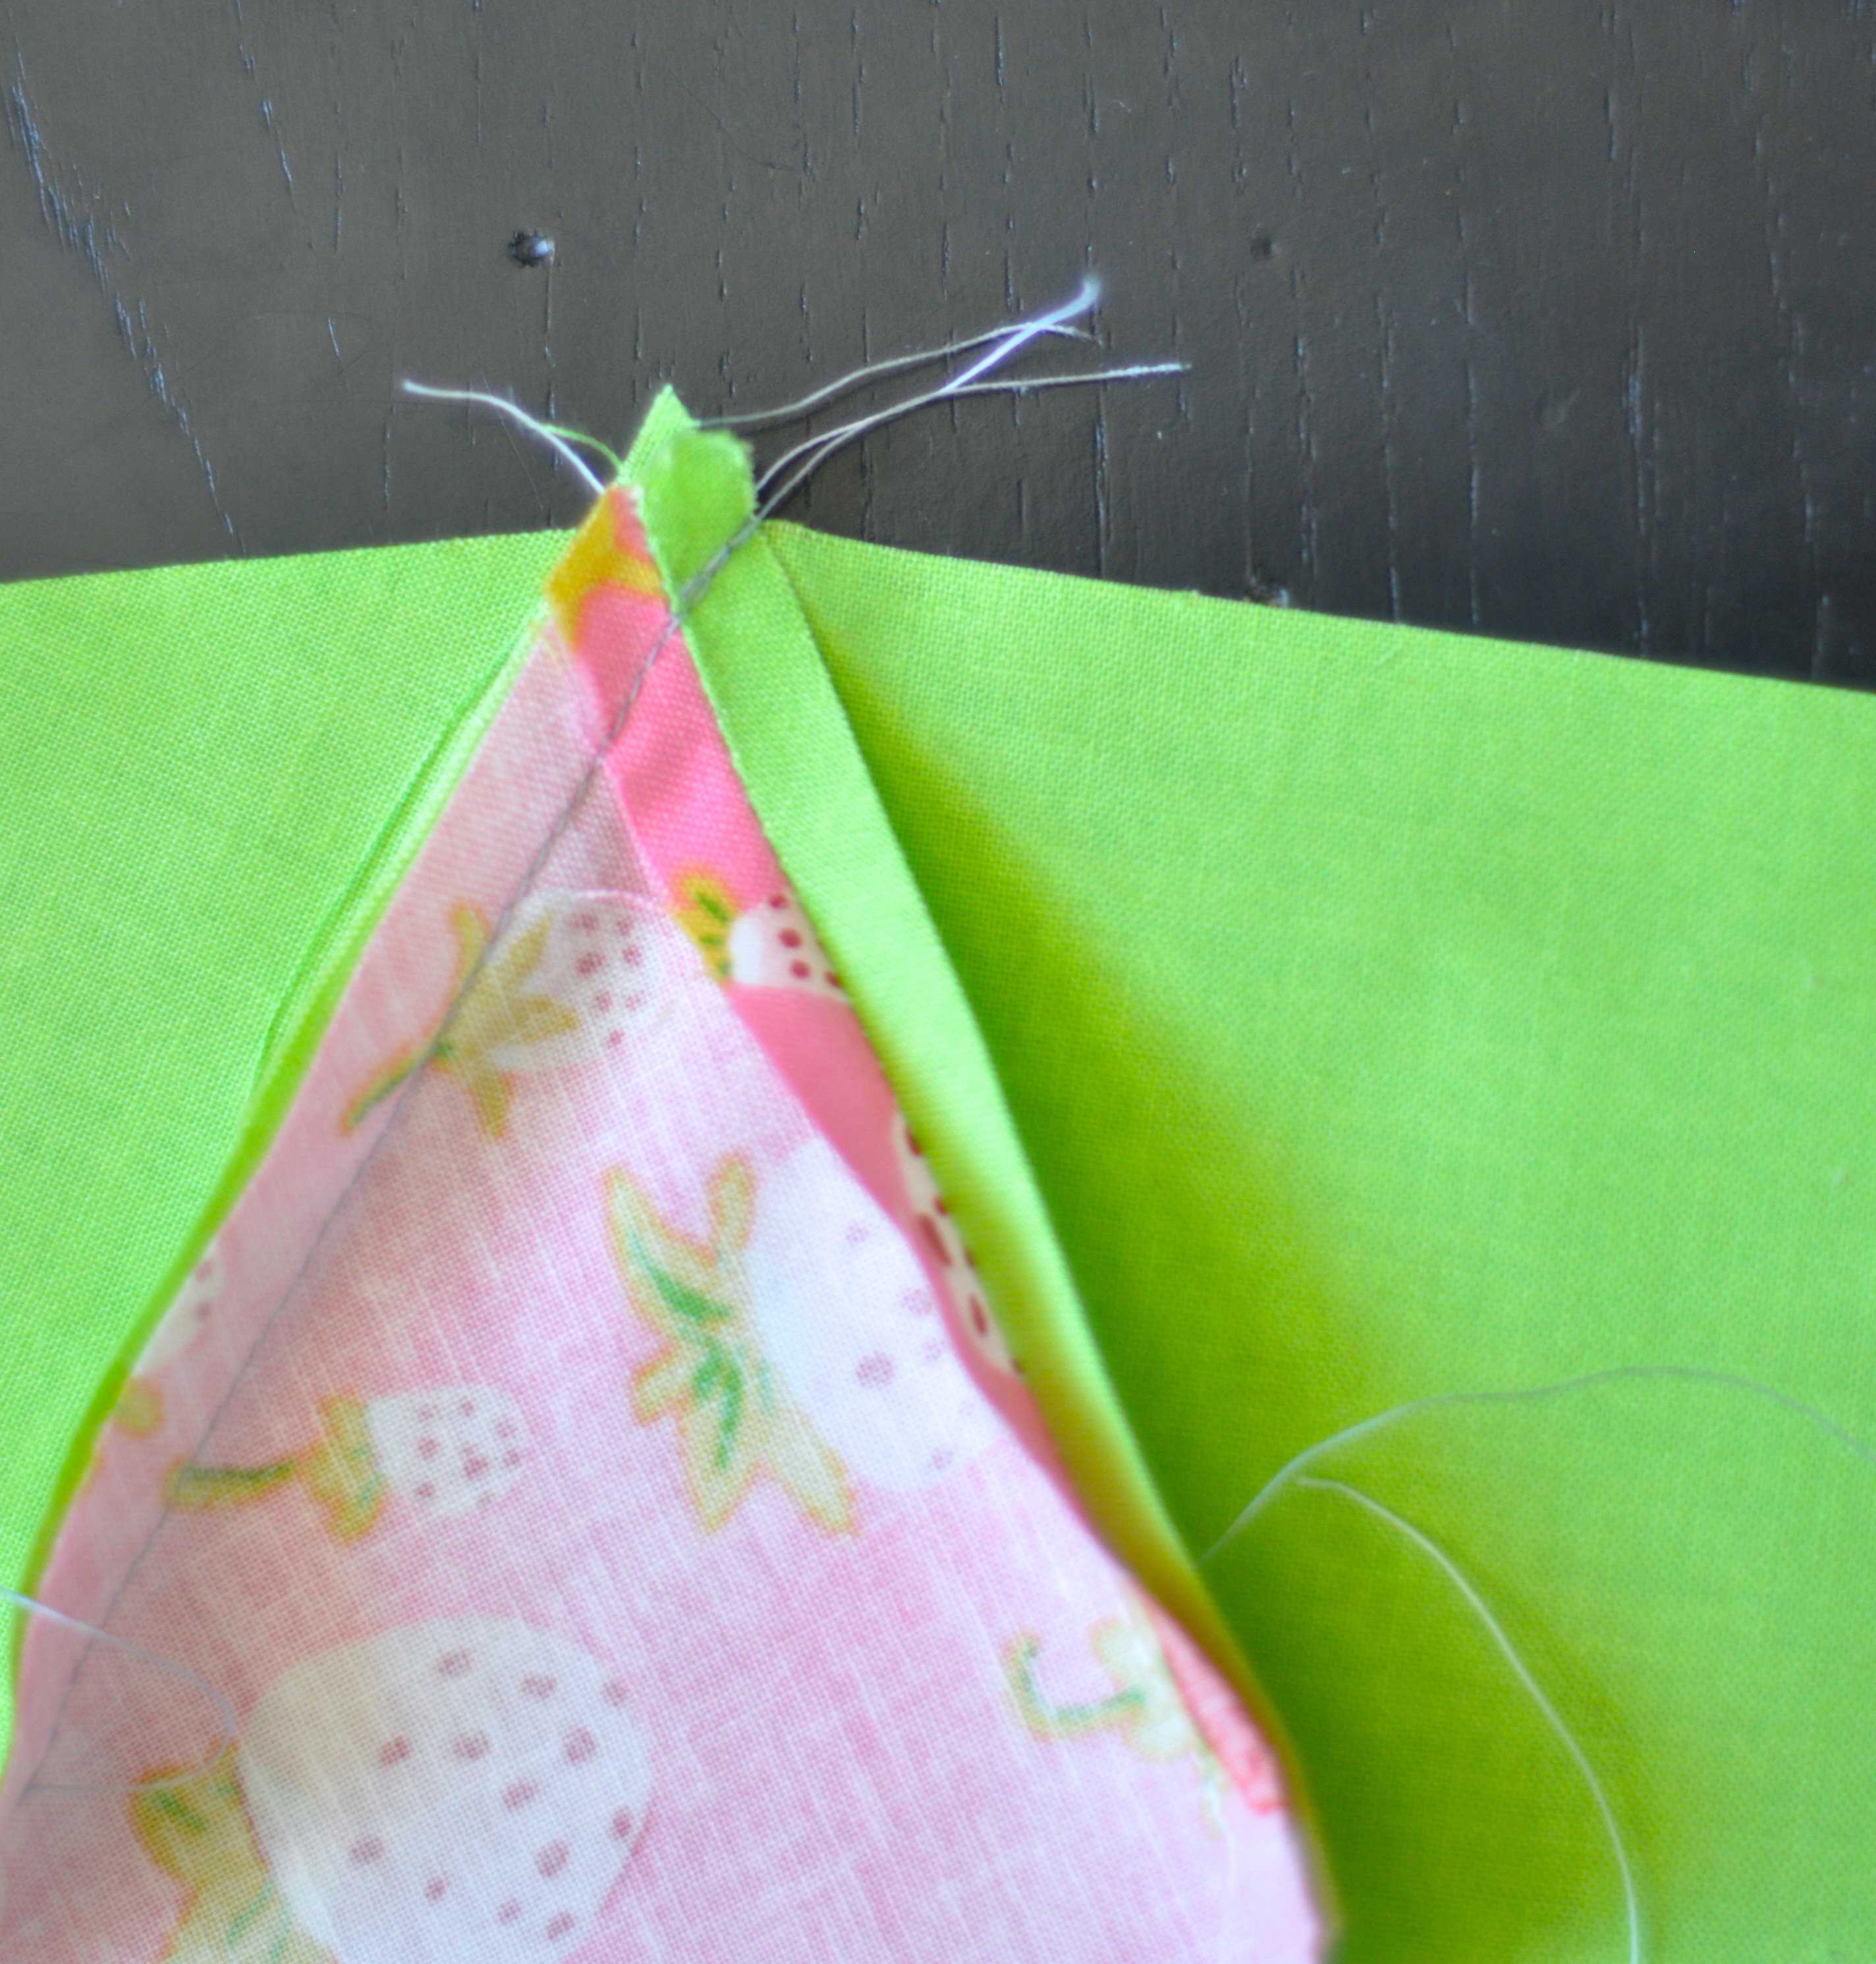
To join up the two halves of the starflower, line up the little corners that hang over the edges.
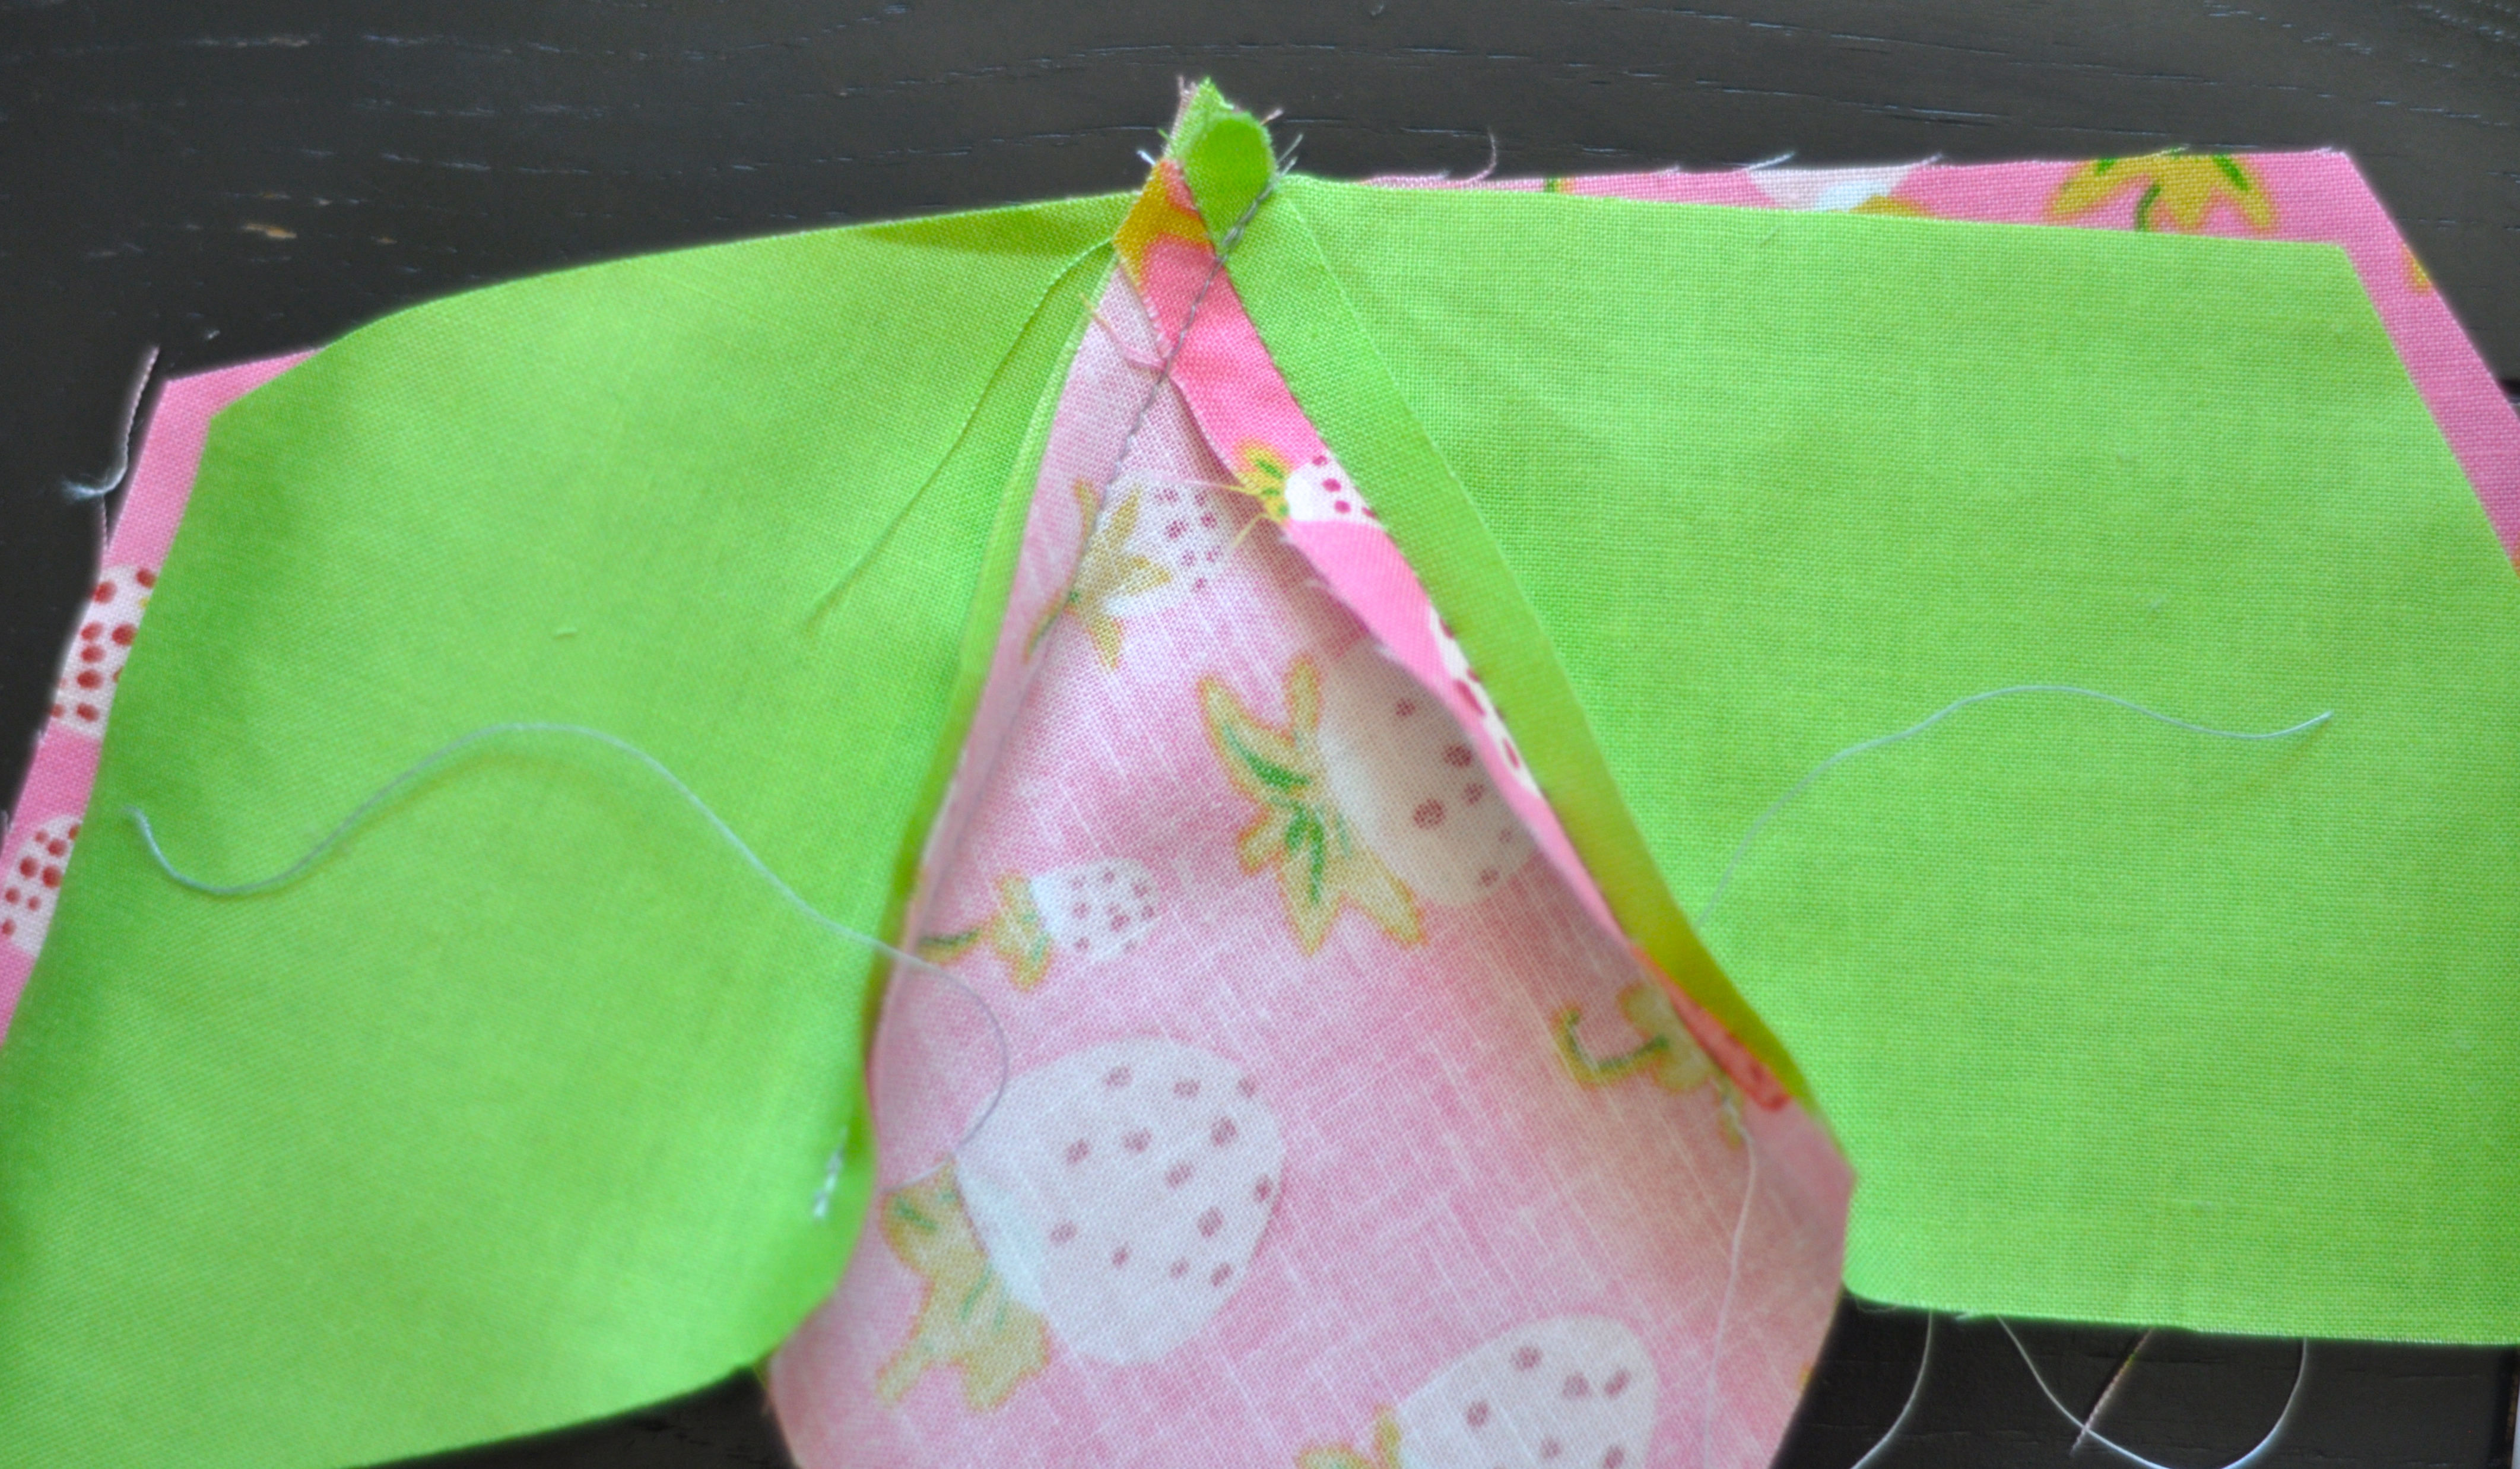
Starting 1/4″ from the edge, sew the two halves together, making sure to sew directly over the place where the two previous seams come to a point. If you sew over this seam junction, you will have practically perfect points every time!
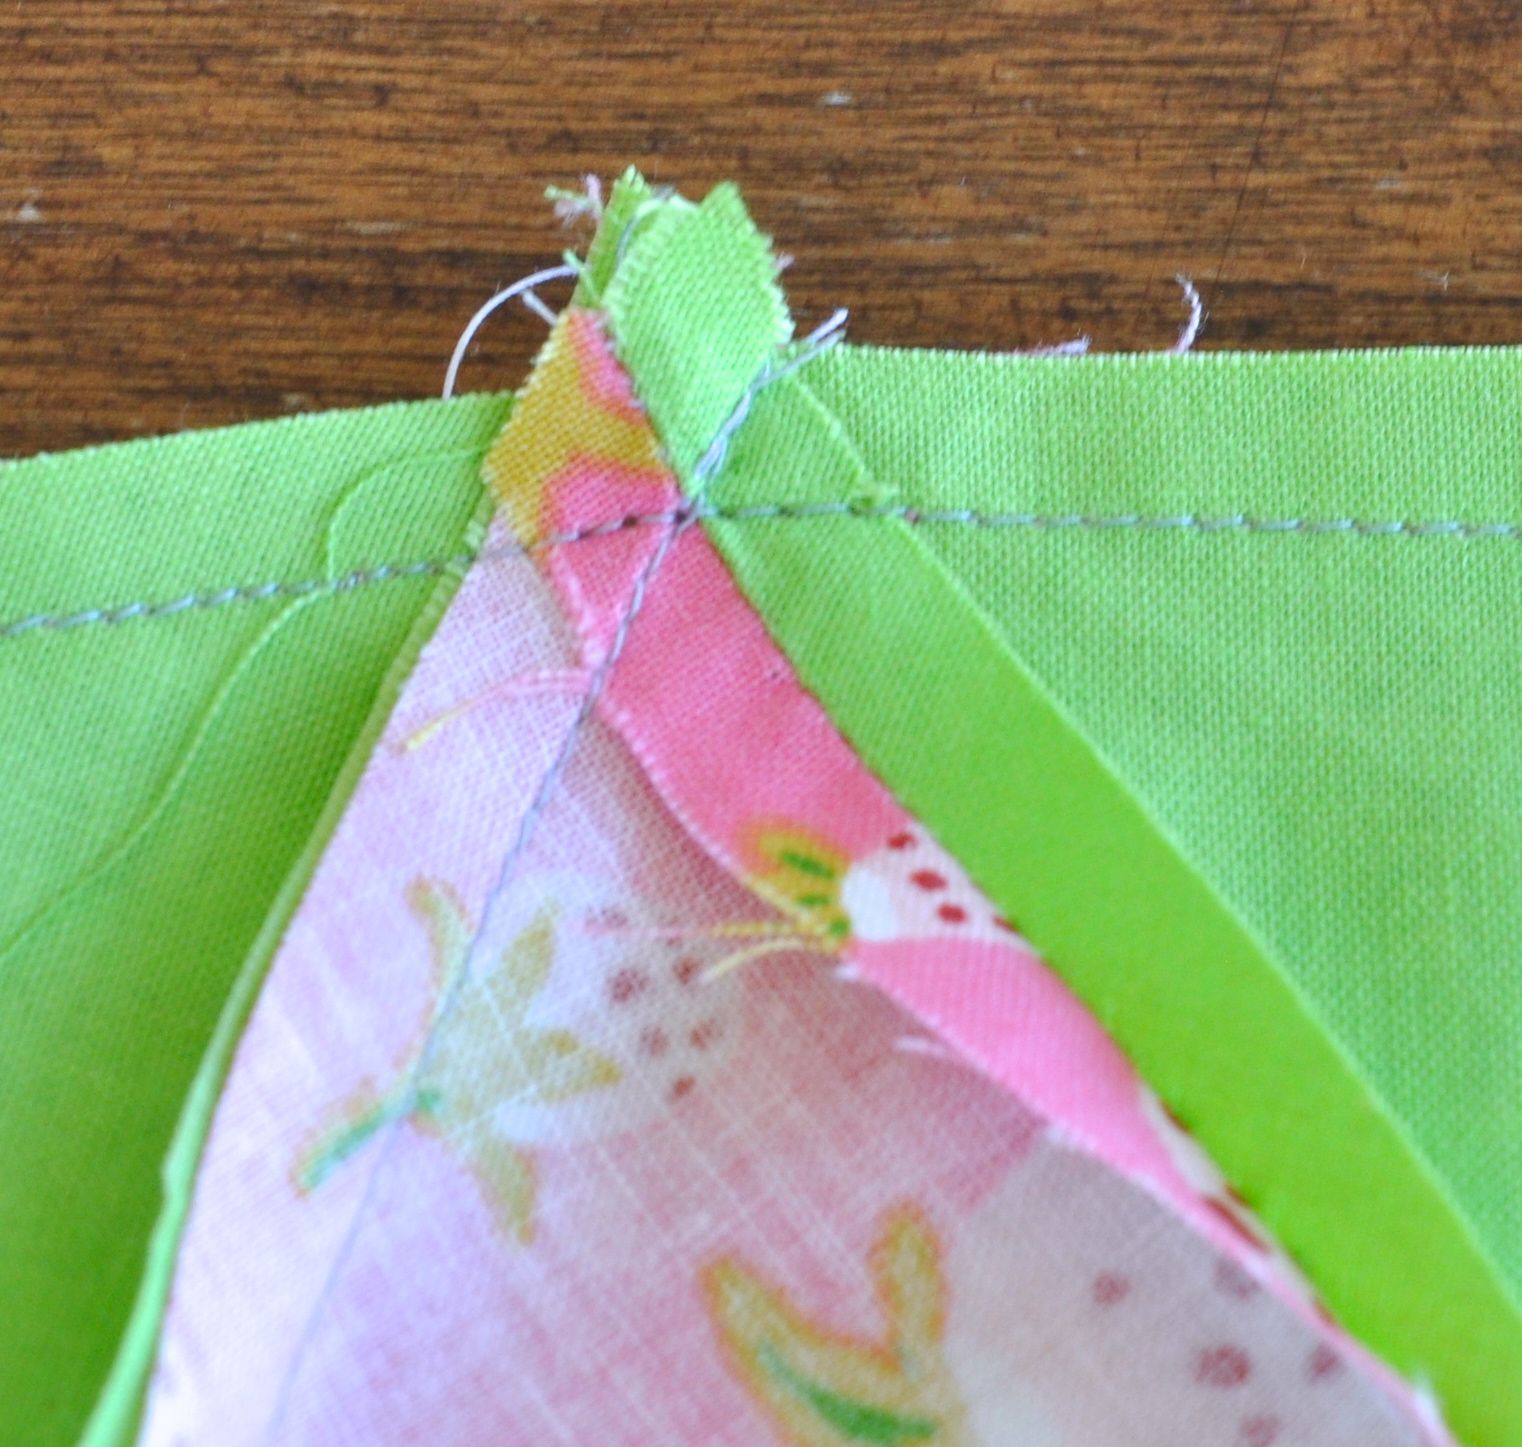
Here’s another angle of that. This is a pretty important step and perfect points are like a hug from your sewing machine 🙂
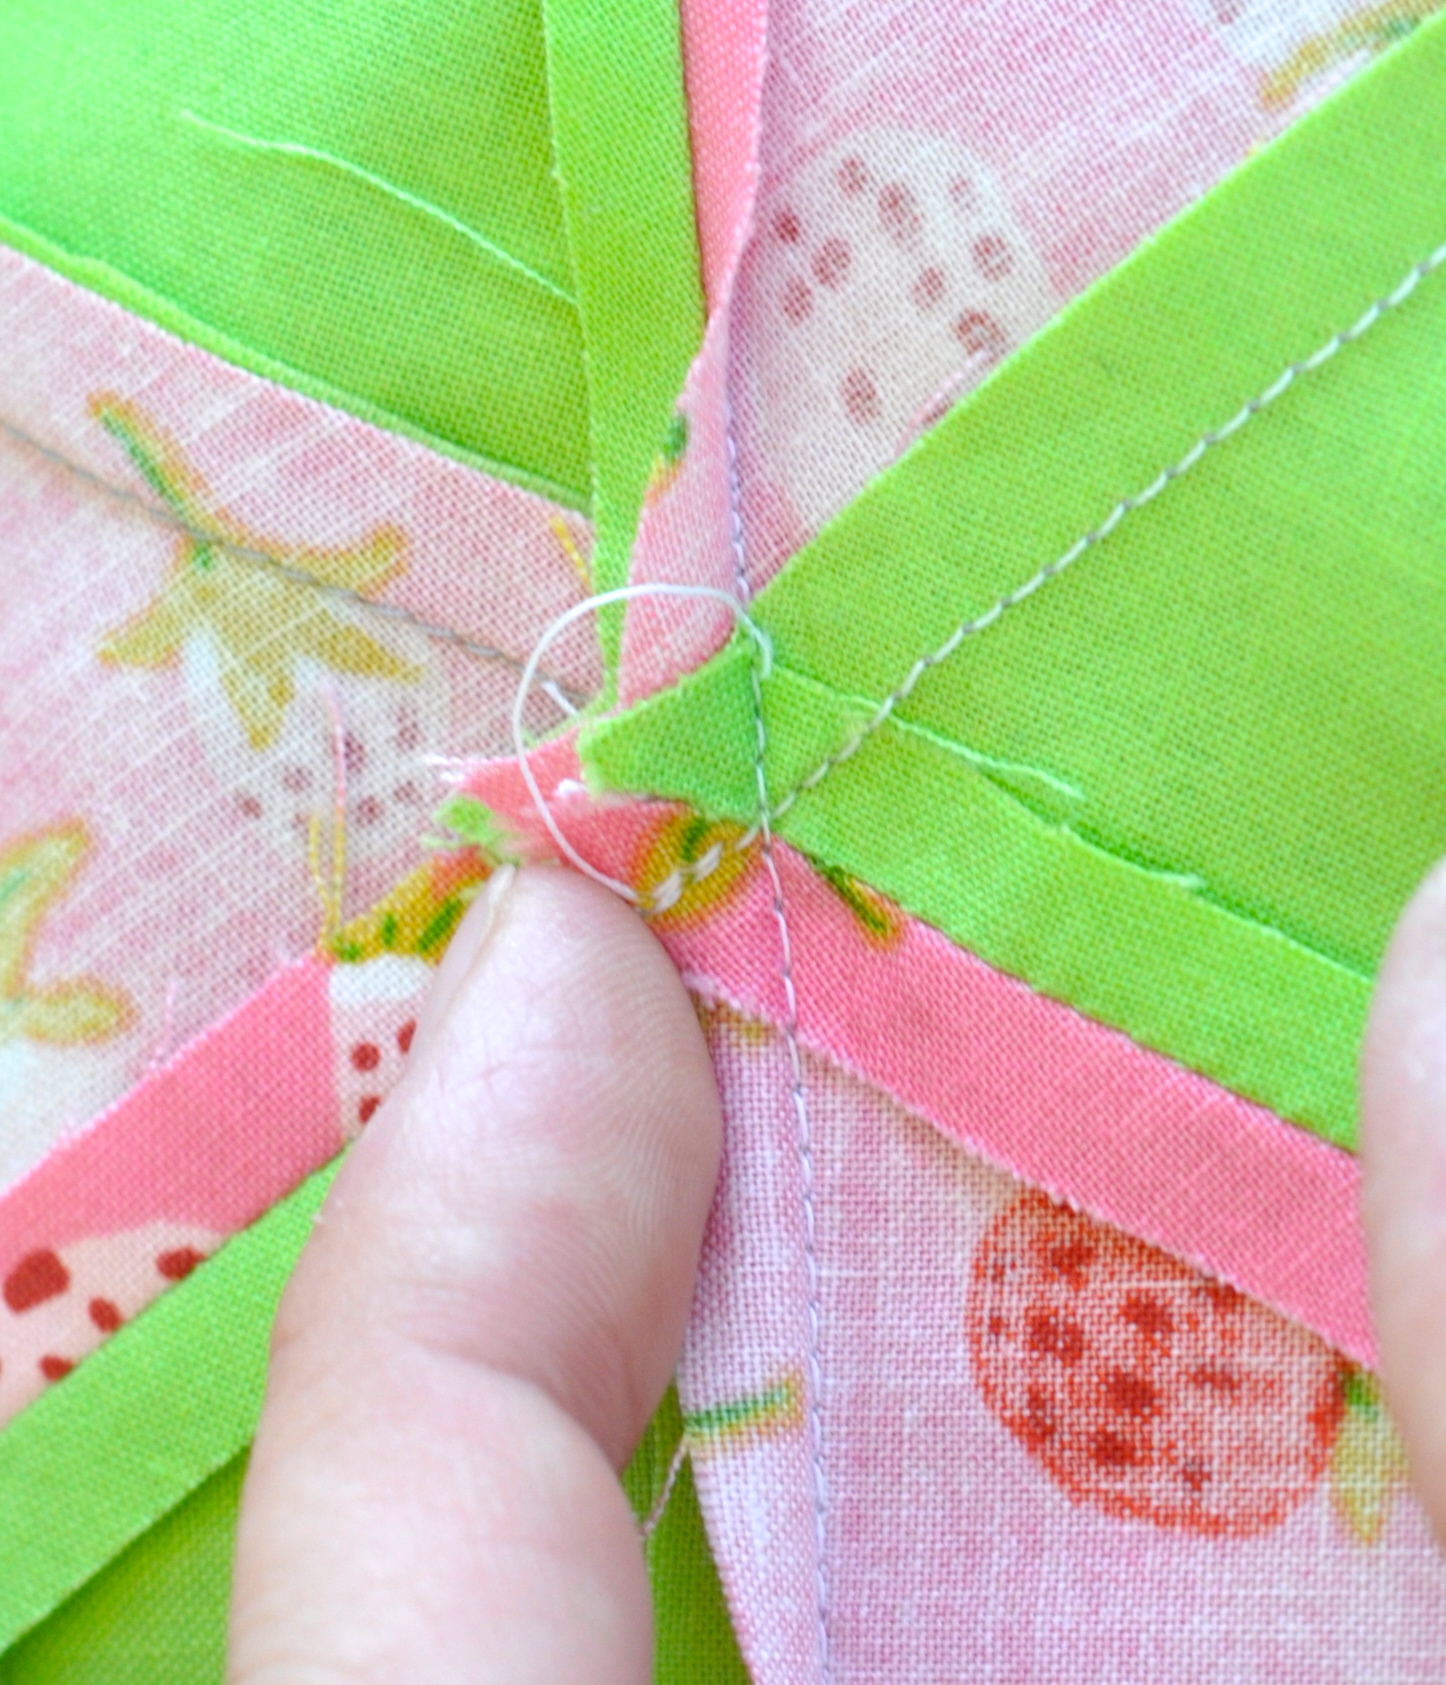
Now, just press your center seam open to relieve as much of the bulk as possible. The back of your star flower should look like this:

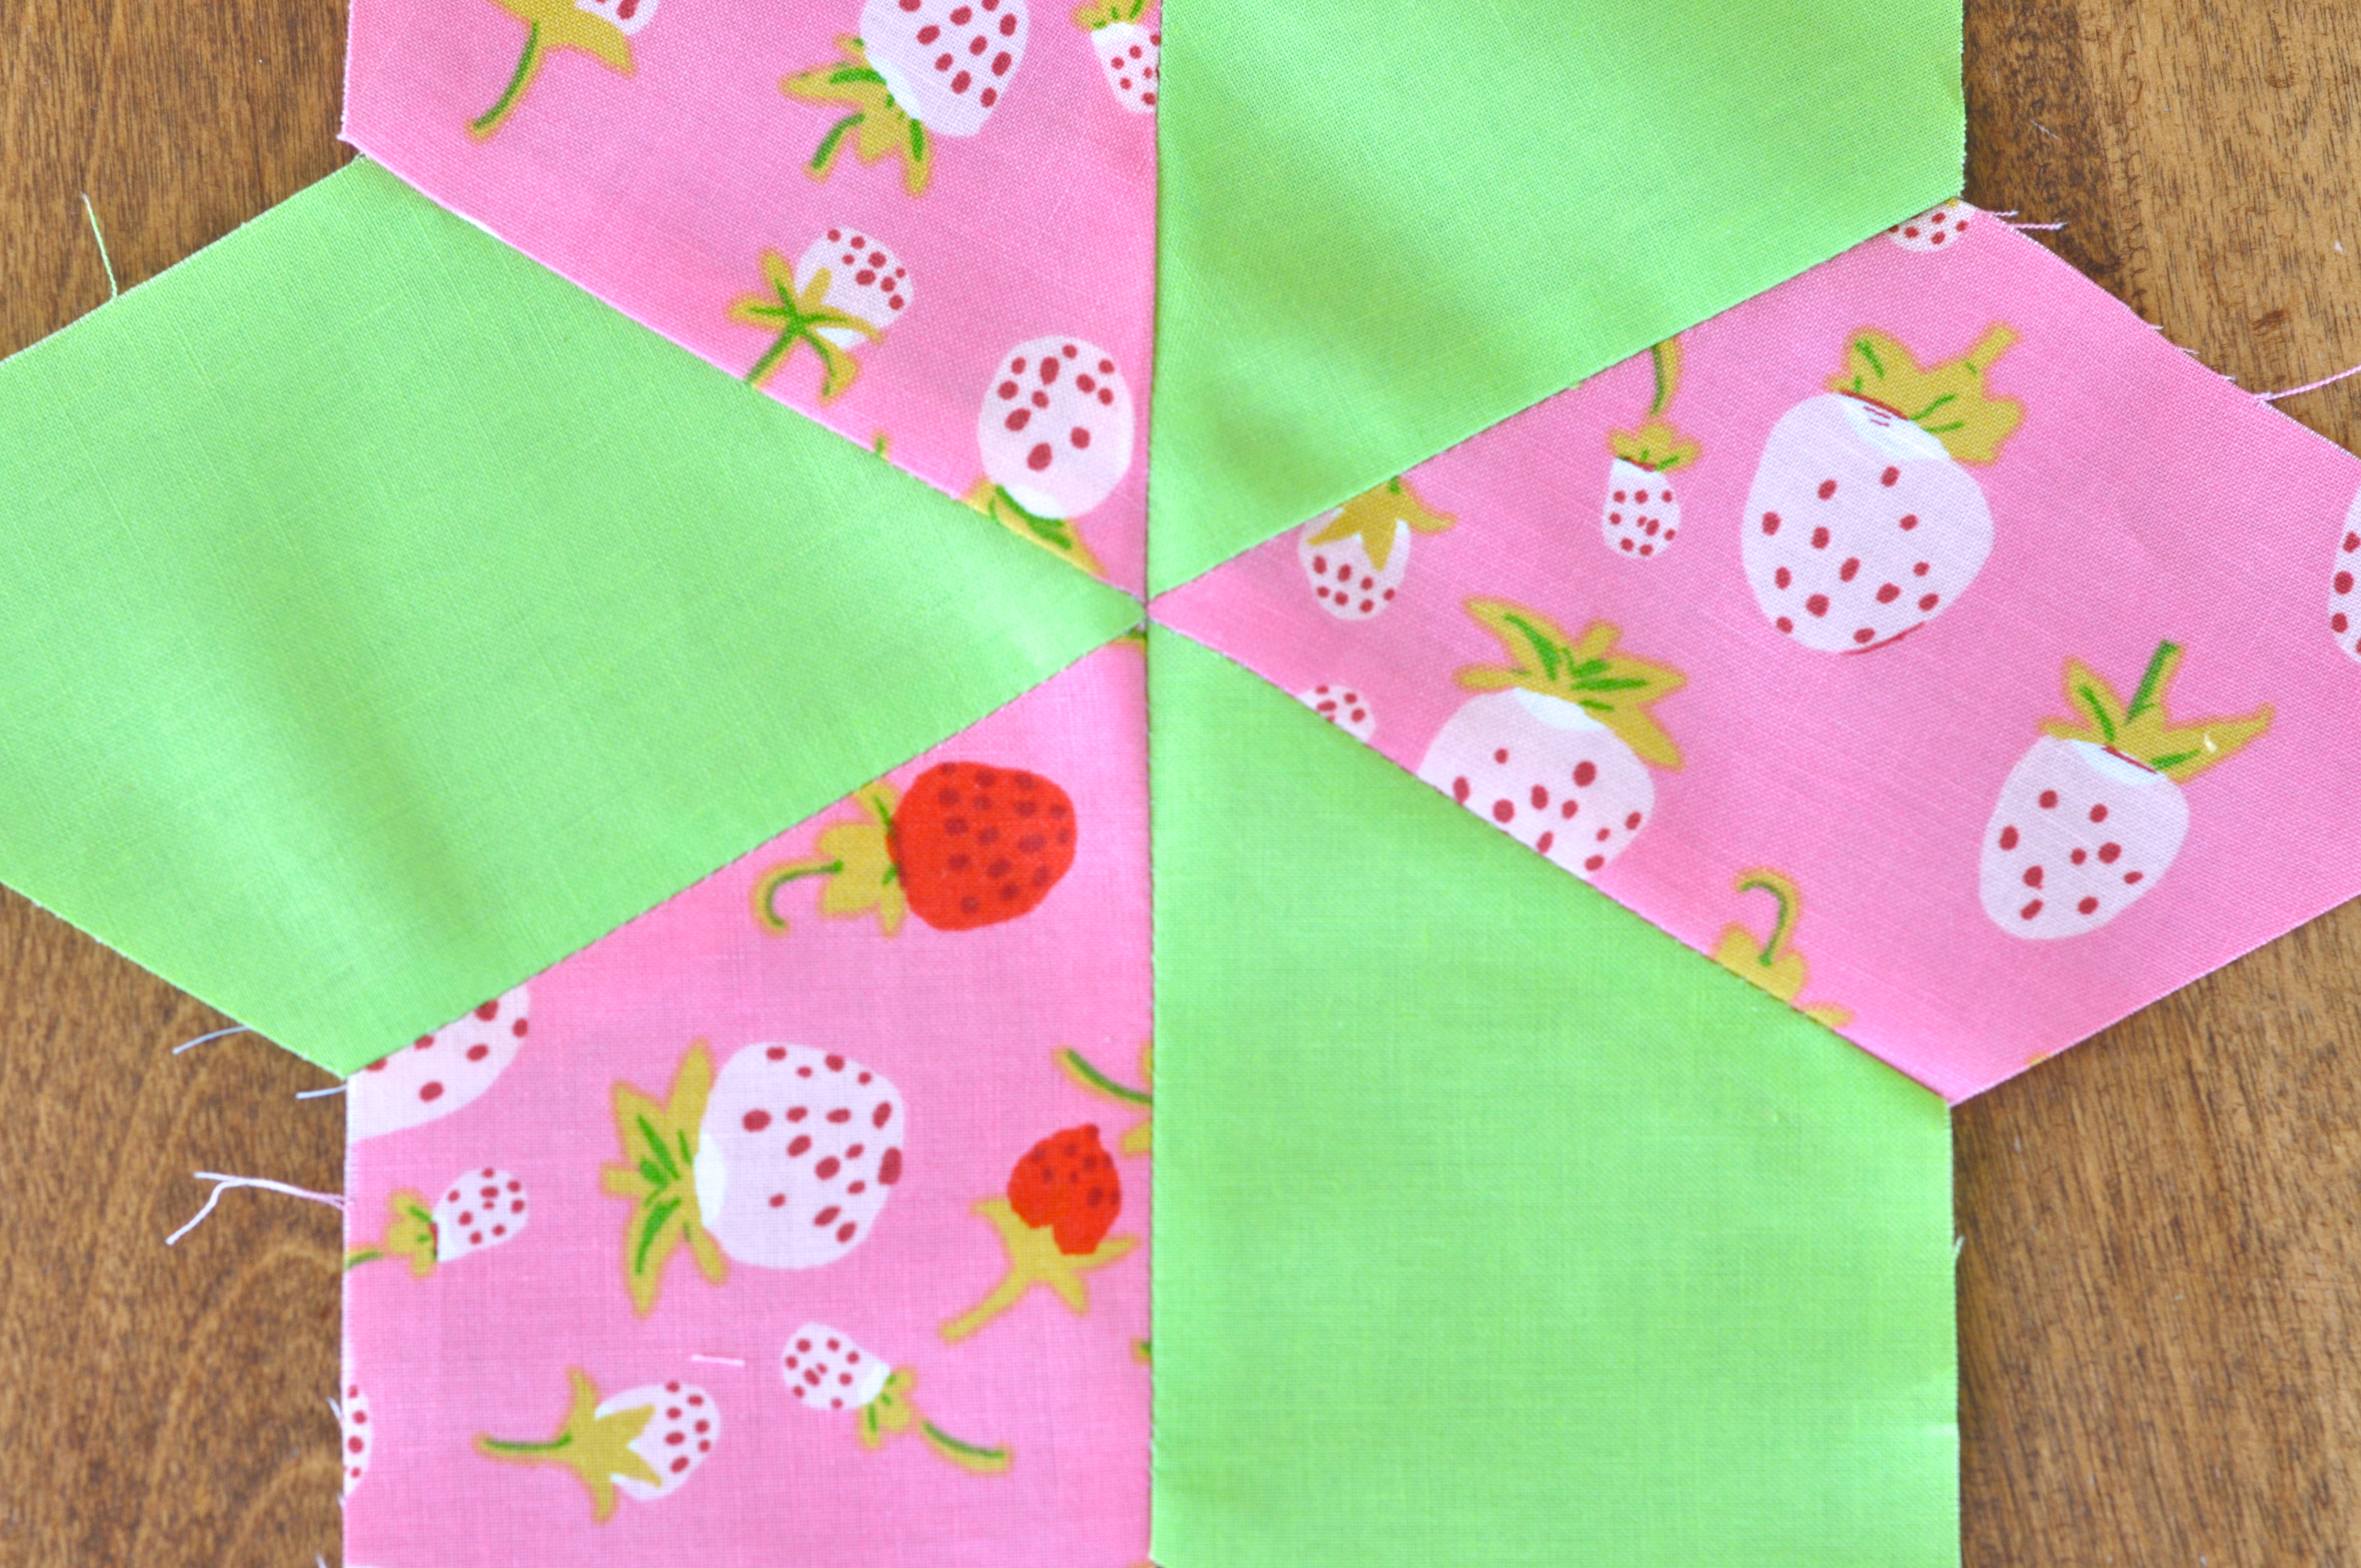
And the front should look something like this:
Hip Hip Hooray! Repeat this 49 more times and you should have 50 (and maybe a few extra!) star flowers ready to be sewn into a quilt top next week!
If you have any questions, I will try and answer them as quickly as possible. It does seem I am better at responding via Facebook and Instagram if you happen to be following along there 🙂
PS: A few people have asked for a picture of the entire star flower quilt. I will try and get one tonight. So far, the best picture I have is in this post

Hmm this is so cute. I may make a few star flowers and make a pillow …..
you’re like a quilting ninja!!!
Hi! I’m starting to put my starflowers together and I had a question. When I get to the last step and I put the 2 halves together should I leave a 1/4 inch on each end? Or sew the whole way? Thanks!
Rhonda