So, today is my birthday and I had a big to-do planned.
But then I started to piece my ‘groove’ quilt.
And it is coming together beautifully (and quickly).
And I hacked the pattern.
Which made me bounce up and down.
So, I had to share with you.
Warning, here there be math…
Come back TOMORROW for some serious ‘i love my bloggy friends’ warm fuzzies (probably in the form of fabric – shhhh!)
But, for right now, let’s talk grooves. Here is where I am at after about two hours of sewing, not counting all of the distractions from hungry babies, shop business, and of course, the ‘mommy, I need a drink’ stop.
Pretty, isn’t she?
But, I am not assembling her according to the directions, so I thought I would share the way I am doing this.
DISCLAIMER! This is not my pattern, nor do I in any way want to take credit for this pattern. This is a pattern ‘hack’. You will need to purchase the pattern from Carolina Patchworks/Emily Cier for any of these directions to make sense. I will NOT be giving any measurements. This is just another way to assemble it without the bulk and weight of many seams. It will also save a bit of fabric from seam allowances and a bit of time for those who love to quilt but don’t have oodles of extra time 🙂
K, ready? Look at your pattern. Follow the colors as they twist their way around the quilt. You are going to see that it is made up of various sized log cabin style blocks that have curves set into them. For this example, I am choosing the half-log cabin block in the bottom left hand corner of the throw sized quilt. Are you with me? If you break the pattern down, you can see that there is a ‘heart’ to the log cabin. It is the SMALLEST piece, the inside piece of each block.
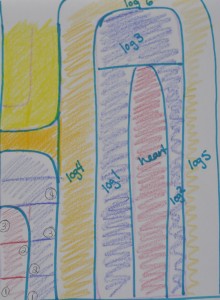
Surrounding it are the logs. I am going to give a brief mini tutorial for how to assemble the ‘log cabin within a log’ on the far left hand side
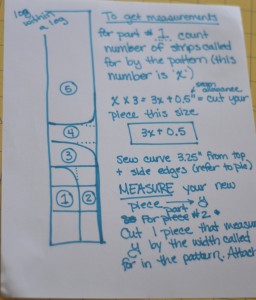
STEP 1: Find your ‘heart’. Count the number of strips that will make up the heart of your block, including the curved pieces.
This number is x
Multiply x times 3. Now, add 1/2 inch for seam allowances. Your formula should look like: 3x + .5 = y
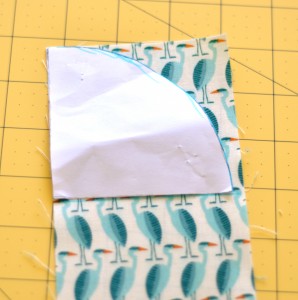
Cut your heart the WIDTH from the pattern by your new y measurement Draw a line in water soluble pin at 3.25″ inches from the top. You can just barely see my line in this picture.
Line up your curved pattern piece with the corner aligned against the left side of the heart. Trace and cut your curve.
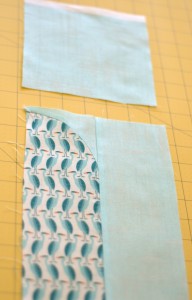
Now, create your outside curve from the pattern template in the next color to be added to your block. Fold the curves in half as shown and pinch, creating a crease.
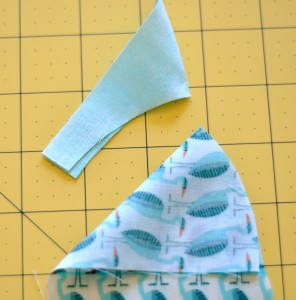
Line up your creases, pin them together. For this method, it is best if you can taper the edge of the outside curve off the edge of the inside curve. Hopefully this picture makes sense to you:
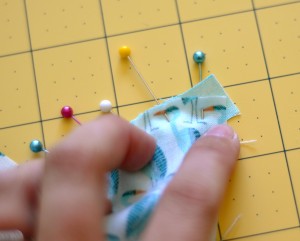
See the little tail hanging over the edge? That is what I am talking about.
CLIP your curve (don’t clip through the seam!), and press seam to the outside. Now, your block will need to be trimmed.
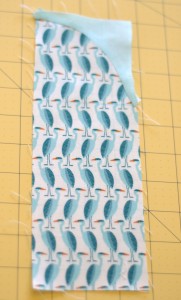
TRIM it down. Your next log is going to be the width specified in the pattern by the height of the piece you just created (should be approximately the same as your x). Sew them together.
MEASURE the width of your new piece. This measurement will be called z
COUNT the number of strips the pattern calls for in the next colorway and insert that number into your
3x+5=y formula.
Cut your next piece z wide and y tall.
Attach it to your log cabin. Now you should have a piece that is starting to look groovy 🙂
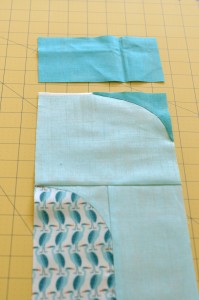
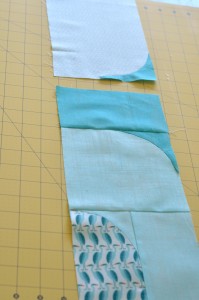
Repeat the above curve process with your new layer. Draw a square 3.25″ x 3.25″ in the top right corner of the rectangle. Cut the curve, and attach the outer curve. Press and trim. Use your formula again to create a new ‘log’ that measures y by z. Attach it where it would go in the pattern if it were made of strips.
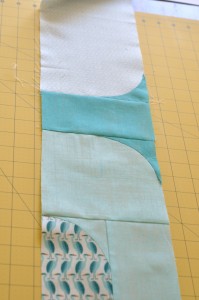
Now, this piece is a teeny bit tricky in that you will need to add your next curve to the bottom of the next log. It is really easy, just draw your 3.25″ square on the bottom right and place your curve there. I chose to attach a WOF piece to the log cabin I had just created, and then trim down to the size that I needed.
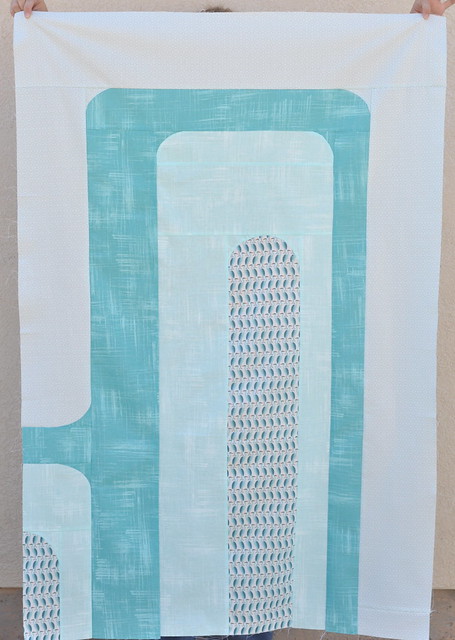
And voila! You are done with one big chunk of piecework. Since this ‘log cabin’ is part of a much bigger log cabin, you can just set it aside until you are ready to attach it. Here it is in all of its log cabin within a log glory 🙂 And I am still loving these colors. I can’t wait to add the dark teal and watch the whole thing really come together!
Hope I see you all tomorrow for a little bit of fun!
xo
Amanda

Happy Birthday! Thank you for explaining all of this but I must admit it will take me some time to figure this all out. I just got my pattern today and when I opened it I was in overload and hope I can get it.
This looks so good! Great colour choice – groovy, but not in a psychadelic crazy kinda way. 🙂
HAPPY BIRTHDAY TO YOU!!!!
Happy birthday! And Thank you! I love love love this! It’s going to save so much time!
Happy Birthday! What a way to spend it! I think I’ll have to make a practice piece and then maybe it will make more sense to me! I’m using patterned fabric for parts of it, so I sure would like to try your method. Thanks for going to all the effort of writing this up.
How are those curves treating you? Still up for the curve master tutorial? Happy Birthday!
Happy Birthday to you!
Thanks for the curve tutorial. I love your quilt. Fantastic!
Happy birthday, dearest daughter! I guess I should have commented yesterday, but we talked…. Who knew you would spend your birthday sewing? I thought you would go have a wild and crazy birthday outing. Love your easier method to make this groovy quilt. Reminds me of my childhood, only in much more sedate colors. Looking forward to the next groovy section.
Hello- Happy BDay! I like variations of patterns. I love your colors! Have a great day!!
Happy Birthday! thanks for the tutorial and i love the fabric !
I am going to have to come back to reread this because without the pattern in front of me this is making me think too much. It saves fabric? Piecing? Both? I am so for that if so, because I could use every time saving tip out there! Thanks and HAPPY BIRTHDAY!
This is looking incredible, Amanda. I love the fabrics you chose. Have a fantastic birthday today!
Happy Birthday! What a perfect way to spend your day….sewing!
I love the way it looks with the fabrics you chose! I just ordered my fabrics for this QAL today but I’ll be bookmarking your hack to try when I get started! Thanks for sharing.
This can be this type of excellent useful resource that you will be offering and you also have apart for free. I love viewing web sites that will see the price of offering a quality useful resource for free. Oahu is the aged exactly what encircles comes on th scene regimen. Do you received a great deal of backlinks i see a great deal of trackbacks?
I tried to resist this QAL since crafty time has been scarce (my 4 month old never seems to want to be put down and I also have a ‘helpful’ 3 year old ;), but after seeing your hack and beautiful fabrics I just bought the pattern and am excited to pick fabric! Hopefully, your post will make perfect sense after I sit down with the pattern. Can I ask what size your going to make? Happy birthday again too! 🙂
This looks so much better than all of those little blocks piled in a row. I’m glad I didn’t read the pattern before I joined the QAL (my first) or I would have backed out. Those instructions (on the pattern) are interesting! Can’t wait to see your progress!
OK, I am keeping this bookmarked – my fabric wont be here for quite a bit still, but I think I just may try this method instead!
Makes total sense. I just ordered my pattern yesterday but was wondering about how it was pieced. Love your hack.
Just received my pattern and I am definitely planning on doing it this way to save time. Your first chunk looks great!